In this post, I will cover different communication patterns between microservices. As microservices have become more industry pattern, it has also become important how these microservices communicate with each other.
The most common pattern for communication has been synchronous REST API calls. But this pattern comes with its own set of trade-offs. Another pattern is asynchronous communication. Let’s dive deeper into these patterns.
Synchronous Calls
The most standard way for services to communicate between themselves is through HTTP synchronous calls. One source service calls a target service. Target service returns with a response that the source service uses for further processing.
In many web applications, a client (front end) calls a backend service (microservice) to fetch or create data.
Similarly, two microservices can communicate with each other through HTTP. Most frameworks provide an HTTP library that allows one service to call another service. For Example – Axios or Feign.
Challenges with Synchronous Communication
Timeout
If service A calls service B to fetch data, but service B takes forever to respond, service A can time out. What happens if the call is going to cause some side-effect on the service B side? In that scenario, there will be data inconsistencies between both services.
Strong coupling
Synchronous communication between services can create strong coupling between services and can be detrimental to microservice architecture overall. Loose coupling was one of the main features of microservices. If any of the services are down, the dependent services might not work the way they were intended.
With event-driven architecture, asynchronous communication has become more popular. One service publishes a message and another service consumes that message. This does not necessarily happen in real-time. Service A publishes a message and still continues to function without knowing in that moment if other services have consumed that message. Consumer services consume the earlier published message when they are ready.
Usually, these services use message-broker to publish and consume the message from. These services may not know each other and offer the advantage of loose coupling.
Another advantage of asynchronous calls is that the message broker offers a retry mechanism. In the scenario, the consumer did not receive the message, the message can be republished.
Challenges with Asynchronous Communication
Message broker
With asynchronous communication, we introduce a centralized entity message broker. If a message broker is down, there will not be any communication between services.
Schema changes
If the publishing service changes the message schema, it can break consumer service unless there is backward compatibility. This defeats the purpose of microservices which allow independent deployments.
Two-phase commit
Publisher service publishes the message as part of business logic. In most cases, it does this by first committing a transaction and then publishing a message. It must perform this action with two-phase commit. But for whatever reason, if the transaction fails and rolled back, then we are in soup since the message has already been published.
In such cases, it is best to avoid a two-phase commit and store the messages in a database on both sides publisher as well consumer.
When to use these patterns?
It’s not very clear when to use Synchronous or Asynchronous calls. When you start designing a system, you will have to make calls and take into account all the trade-offs. Irrespective of that, one can follow certain notions about when to use these patterns
If you want to query data from another service and want to use that data immediately, use Synchronous communication.
If a call to another service is allowed to fail and does not bring down the calling service or any dependent services, you can use Synchronous communication without any fancy retry mechanism.
If a service wants to change the state of certain business logic, in such a scenario, it can publish a message with an Asynchronous communication pattern.
Two services involved in a business logic do not need to perform the action immediately or do not depend on the results of the action.
Conclusion
In this post, I discussed the communication patterns of microservices. In synchronous communication patterns, one can use HTTP or gRPC protocols. In asynchronous communication patterns, one can use a message broker for publishing and subscribing to messages.
In this post, I will show how to implement basic authentication using Passport.js in a NestJS Application. So far in the NestJS series, we have covered
Basic authentication though not secure for production applications, has been an authentication strategy for a long time.
Usually, a user accesses the application and enters a username and password on the login screen. The backend server will verify the username and password to authenticate the user.
There are a few security concerns with basic authentication
Password entered is plain text. It all depends on how the backend is handling the verification of passwords as well as the storage of passwords. The recommended way is to store the hash of the password when the account is created. Hashing is a one-way mechanism. So we will never know user passwords and if a database is breached, we won’t be exposing passwords.
If we don’t use re-captcha mechanism, it is easy for attackers to attack with a DDOS attack.
Passport Library
We will use Passport library as part of this demo. Passport is authentication middleware for Node JS applications. NestJS Documentation also recommends using the passport library.
As part of using Passport library, you will implement an authentication strategy (local for basic authentication OR saml for SAML SSO).
In this implementation, we will implement a method validate to validate user credentials.
Let’s create a project for this demo and we will create two separate directories for frontend (ui) and backend.
Frontend application with React
In our ui directory, we will use reactjs framework to build the UI. If you are using react-scripts, we will start with
npx create-react-app ui
Create the login page
Once we have react app created, we have the bare bones of the app to make sure it is running. Now, we will add a login page where the user will enter credentials.
We will need two libraries in the login page Signin.js
axios to call backend API
useNavigation to navigate to different pages.
handleSubmit is a function that we will call when a user submits the form on the login screen.
Once the user submits the form, handleSubmit collects submitted data and calls backend API with that form data.
User sign up
The sign in page can be of less help if there is no for users to sign up. Of course, it all depends on your user flow.
On the user signup page, we will be asking for firstName, lastName, email and password. Similar to signin page, we will have a handleSubmit function that will submit the signup form. It will call the backend API for signup.
let navigate = useNavigate();
const handleSubmit = async (event) => {
event.preventDefault();
const data = new FormData(event.currentTarget);
console.log(data);
const form = {
firstName : data.get('fname'),
lastName: data.get('lname'),
email: data.get('email'),
password: data.get('password')
};
await axios.post("http://localhost:3000/api/v1/user/signup", form);
navigate('/')
};
We will call this function handleSubmit on the event call onSubmit
As far as the Home page is concerned, we have a simple home page that shows Welcome to Dashboard. The user will navigate to the home page if authenticated successfully.
Backend application with NestJS
Let’s look at the backend side of this application. I will not show the basics of creating a NestJS app and setting up Prisma as ORM. You can follow those details here .
We will create a user table as part of the Prisma setup.
// This is your Prisma schema file,
// learn more about it in the docs: https://pris.ly/d/prisma-schema
generator client {
provider = "prisma-client-js"
}
datasource db {
provider = "mysql"
url = env("DATABASE_URL")
}
model User {
id String @id @default(uuid())
email String @unique
first_name String
last_name String?
password String
createdAt DateTime @default(now())
updatedAt DateTime @updatedAt
}
When a user signs up for our application, we will store that information in User table.
Controller for backend APIs
We will need two APIs – one for signup and one for sign-in. We already showed in the frontend section about the sign-up page. When the user submits sign-up page, we will call sign-up API on the backend.
@Post('/signup')
async create(@Res() response, @Body() createUserDto: CreateUserDto) {
const user = await this.usersService.createUser(createUserDto);
return response.status(HttpStatus.CREATED).json({
user
});
}
The frontend will pass an object for CreateUserDto and our UsersService will use that DTO to create users with the help of a repository.
Controller -> Service -> Repository.
Service performs the business logic and the repository interacts with the database.
import { Injectable } from '@nestjs/common';
import { PrismaService } from 'src/common/prisma.service';
import { CreateUserDto } from './dtos/create-user.dto';
import * as bcrypt from 'bcryptjs';
import { UserRepository } from './user.repository';
import { User } from './entities/user.entity';
@Injectable()
export class UsersService {
constructor(private readonly prismaService: PrismaService, private readonly userRepository: UserRepository) {}
async createUser(user: CreateUserDto) {
const hashedPassword = await bcrypt.hash(user.password, 12);
const userToBeCreated = User.createNewUser({
firstName: user.firstName,
lastName: user.lastName,
email: user.email,
password: hashedPassword,
});
return await this.userRepository.save(userToBeCreated);
}
async findById(id: string) {
return await this.userRepository.findById(id);
}
async getByEmail(email: string) {
const user = await this.userRepository.findByEmail(email);
return user;
}
}
As you can see above, while creating a new user, we are storing the hash of the password in the database.
We will use a basic authentication mechanism for our application. Passport calls these mechanisms as strategies. So, we will be using the local strategy.
In NestJS application, we basically implement the local strategy by extending PassportStrategy.
import { Injectable, } from "@nestjs/common";
import { PassportStrategy } from '@nestjs/passport';
import { Strategy } from 'passport-local';
import { User } from "src/users/entities/user.entity";
import { AuthService } from "./auth.service";
@Injectable()
export class LocalStrategy extends PassportStrategy(Strategy) {
constructor(private readonly authService: AuthService) {
super({
usernameField: 'email'
});
}
async validate(email: string, password: string): Promise {
return this.authService.getAuthenticatedUser(email, password);
}
}
For the local strategy, passport calls validate the method with email and password as parameters. Eventually, we will also set up an Authentication Guard.
Validate method uses authService to get authenticated user. This looks like below:
import { HttpException, HttpStatus, Injectable } from '@nestjs/common';
import * as bcrypt from 'bcryptjs';
import { User } from 'src/users/entities/user.entity';
import { UsersService } from 'src/users/users.service';
@Injectable()
export class AuthService {
constructor(private readonly userService: UsersService) {}
async getAuthenticatedUser(email: string, password: string): Promise {
try {
const user = await this.userService.getByEmail(email);
console.log(user);
await this.validatePassword(password, user.password);
return user;
} catch (e) {
throw new HttpException('Invalid Credentials', HttpStatus.BAD_REQUEST);
}
}
async validatePassword(password: string, hashedPassword: string) {
const passwordMatched = await bcrypt.compare(
password,
hashedPassword,
);
if (!passwordMatched) {
throw new HttpException('Invalid Credentials', HttpStatus.BAD_REQUEST);
}
}
}
Passport provides in-built guard AuthGuard. Depending on what strategy you are using, we can extend this AuthGuard as below:
import { Injectable } from "@nestjs/common";
import { AuthGuard } from "@nestjs/passport";
@Injectable()
export class LocalAuthGuard extends AuthGuard('local') {
}
Now in our controller, we will use this guard for authentication purposes. Make sure you have set up your Authentication Module to provide LocalStrategy.
import { Module } from '@nestjs/common';
import { AuthService } from './auth.service';
import { AuthController } from './auth.controller';
import { UsersModule } from 'src/users/users.module';
import { PrismaModule } from 'src/common/prisma.module';
import { LocalStrategy } from './local.strategy';
import { PassportModule } from '@nestjs/passport';
@Module({
imports: [UsersModule, PrismaModule, PassportModule],
controllers: [AuthController],
providers: [AuthService, LocalStrategy]
})
export class AuthModule {}
In our User Controller, we have added @UseGuards(LocalAuthGuard).
Demonstration of Basic Authentication with Passport
We have covered the front end and backend. Let’s take a look at the actual demo of this application now.
Go to frontend directory and start our react app
npm start
It will run by default on port 3000, but I have set port 3001 to use.
start : set PORT=3001 && react-scripts start
Also start the backend NestJS app
npm run start
This will run by default on port 3000. I have not changed that and using the default port. The frontend will call backend APIs on port 3000. Of course, in real-world applications, you will have some middleware like a load balancer or gateway to route your API calls.
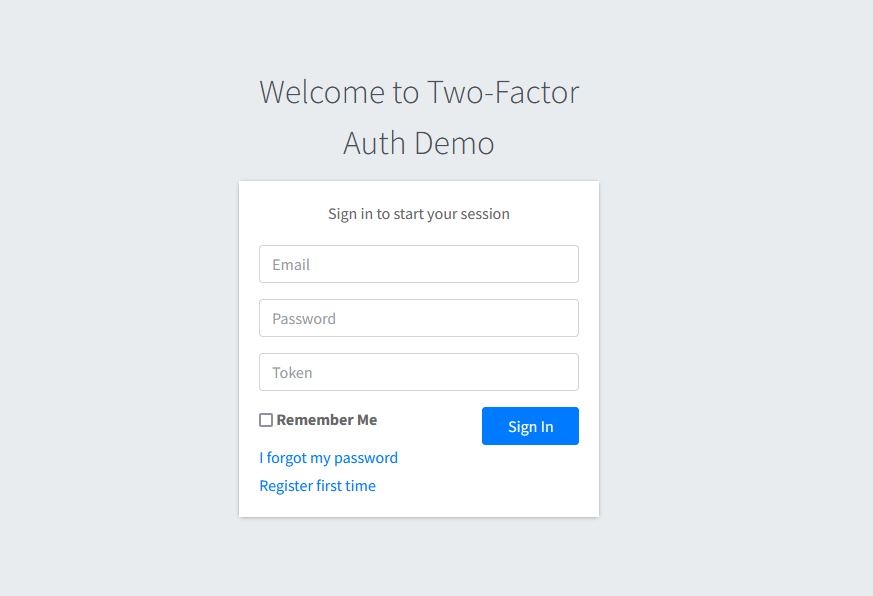
Once the applications are running, access the demo app at http://localhost:3001 and it should show the login screen.
If you don’t have a user, we will create a new user with sign-up option. Once the user enters credentials, user will see the home page
That’s all. The code for this demo is available here.
Conclusion
In this post, I showed the details of the Passport library and how you can use this library for basic authentication in a Nest JS and React application.
In this post, I will show how to upload a file to S3 using a NestJS application and Multer. S3 is Amazon’s Simple Storage Service (S3). In old systems, one could upload files to a database. However, with storage services, it is easier to upload and retrieve files. This is also more performant.
If you are a beginner with the NestJS framework, I would recommend reading their documentation. I have written some posts about NestJS previously here, here, and here.
Simple Storage Service
Simple storage service is also known as S3. Irrespective of what kind of application you build, you have to store static files somewhere. AWS offers a simple and effective service called S3. As previously mentioned in the post, application developers used to save files in the database, but that is not very performant.
With S3, now you can store the file in a storage service and create a file link that you can save in the database.
To understand S3 is to understand a hash table. Usually, when you store any file on S3, the service generates a random string as a key to identify that file. The file is the blob format data.
AWS S3 is targeted towards application builders to individual users. The advantages of S3 are scalability, high availability, performance, and security. S3 can also be used for redundancy. One thing to remember is that you can not use S3 to host a static website, especially if you want to use it with HTTPS.
Setting up an S3 bucket
For this demo, let’s set up an S3 bucket in the AWS S3 service. I would assume that you have an AWS account with enough permissions to manage resources like creating or deleting buckets. If you don’t, you can always create an account for AWS with a free tier. Over the years, AWS has done a great job to help developers play with their services and improve them.
Once you have your user, make sure to download the AWS Access Key and AWS Secret Key. We will need these keys to call AWS services programmatically.
Let’s create a bucket in S3.
NestJS Application
Let’s create a nestjs application. If you do not have nest-cli downloaded, I would recommend use npm i @nestjs/cli.
1. Set up Application
Create a new application
nest new fileuploaddemo
Once we have the facade of the application, we will create an API, service, and a database table. If you are wondering, why a database table, then to answer that – We will use a database to store file metadata information including the link and when it was created.
Just like previous articles, we will use prisma as our ORM for creating this nestjs application.
Install Prisma dependencies
npm install prisma --save-dev
npm install @prisma/client
Create initial Prisma set up
npx prisma init
If you are using Windows environment, you might run into an error while running above command. So set environment variables
set PRISMA_CLI_QUERY_ENGINE_TYPE=binary
set PRISMA_CLIENT_ENGINE_TYPE=binary
Add the database table details in schema.prisma file
// This is your Prisma schema file,
// learn more about it in the docs: https://pris.ly/d/prisma-schema
generator client {
provider = "prisma-client-js"
}
datasource db {
provider = "mysql"
url = env("DATABASE_URL")
}
model FileEntity {
id Int @default(autoincrement()) @id
fileName String
fileUrl String
key String
createdAt DateTime @default(now())
updatedAt DateTime @updatedAt
}
And make sure to set DATABASE_URL as the environment variable before running Prisma migrations.
Run prisma migrations
npm prisma migrate dev
2. Set up environment
We will need a few environment variables to make sure our application is functioning.
So create .env file in your application and add the following variables.
Usually, a client application will send us file details through form-data. For this demo, we will create an API that the client application can call. This will be our upload API.
import { Controller, Post, UploadedFile, UseInterceptors } from "@nestjs/common";
import { FileInterceptor } from "@nestjs/platform-express";
import { FileUploadService } from "src/services/fileupload.service";
import { Express } from 'express';
@Controller('/v1/api/fileUpload')
export class FileController {
constructor(private fileUploadService: FileUploadService) {}
@Post()
@UseInterceptors(FileInterceptor('file'))
async uploadFile(@UploadedFile() file: Express.Multer.File): Promise {
const uploadedFile = await this.fileUploadService.uploadFile(file.buffer, file.originalname);
console.log('File has been uploaded,', uploadedFile.fileName);
}
}
In this API, we are using FileInterceptor from NestJS which extracts file details from the request.
The API is straightforward. We pass the file metadata information to FileUploadService and that does the job of uploading the file to S3 as well as saving the data in the database.
4. FileInterceptor for File Upload
An interceptor is one of the fundamental concepts in NestJS. Interceptor is a class with annotation @Injectable() and implements NestInterceptor interface.
5. Create a FileUploadService
FileUploadService will perform two tasks. One is to upload the file to S3 and the second is to store the metadata in the database.
We have a method called uploadFile in this service class. It takes two parameters one for a data buffer and the other for a file name.
We create an S3 instance using S3() and use that to upload files to S3. It needs a bucket name, a data buffer in the body, and a unique key for storing the file.
We use the location as fileUrl from the uploaded file. And then save the metadata information in the database.
6. Final Demo
Let’s run our application to see how it is working now.
npm run start – will start the application at default port 3000.
We will use postman to call our upload API.
Once we upload the file, we will see a console message of file uploaded.
And similarly, a database entry
Just to make sure that we have our files uploaded in S3, let’s look at the bucket.
You will see two entries in the bucket.
Conclusion
In this post, we discussed how we can upload a file to AWS Simple Storage Service (S3) using NestJS application. We only covered the surface of this vast topic of S3. You can also manage to upload private files, encrypt, and decrypt those files. You can also subscribe to events of file upload. There are a lot of options when it comes to AWS S3. We will cover more in the upcoming series of NestJS applications.
In this post, I will discuss how the Spring Security Filter chain works. Spring Security uses a chain of filters to execute security features. If you want to customize or add your logic for any security feature, you can write your filter and call during the chain execution.
Introduction
If you use Spring security in a web application, the request from the client will go through a chain of security filters. Security filters adapt this concept from Web Servlets.
Basically, you have a controller to receive user requests. Security filters will intercept the incoming request and perform validation for authentication or authorization before redirecting the request to the target controller.
In short, the flow goes like
The user accesses the application that is secured through Spring Security. Usually, this will be through a web browser and the application will send the request to a web server.
The web server parses the incoming request HttpServletRequest and passes it through Spring Security filters. Each filter will perform its logic to make sure the incoming request is secure.
If everything goes well, the request will eventually come to MVC Controller which hosts the backend for the application. Filters can create HttpServletResponse and return to the client without even reaching the controller.
What is Spring Security Filter Chain?
Let’s create a simple web app using Spring Boot and Spring Security.
Add these two dependencies in your build.gradle file to get started
I will keep this app simple, so let’s add a REST controller to our web app.
package com.betterjavacode.securityfilterdemo.controllers;
import org.springframework.web.bind.annotation.GetMapping;
import org.springframework.web.bind.annotation.RestController;
@RestController
public class MainController
{
@GetMapping("/home")
public String home() {
return "Welcome, home!!!!";
}
}
Consequently, we will run our application now.
Run the application
Once, we execute the app, we will see the log that Spring Boot prints by default. This log looks like the below:
2022-08-13 10:24:13.120 INFO 9368 --- [ main] c.b.s.SecurityfilterdemoApplication : Starting SecurityfilterdemoApplication using Java 1.8.0_212 on YMALI2019 with PID 9368 (C:\projects\securityfilterdemo\build\libs\securityfilterdemo-0.0.1-SNAPSHOT.jar started by Yogesh Mali in C:\projects\securityfilterdemo\build\libs)
2022-08-13 10:24:13.123 INFO 9368 --- [ main] c.b.s.SecurityfilterdemoApplication : No active profile set, falling back to 1 default profile: "default"
2022-08-13 10:24:14.543 INFO 9368 --- [ main] o.s.b.w.embedded.tomcat.TomcatWebServer : Tomcat initialized with port(s): 8080 (http)
2022-08-13 10:24:14.553 INFO 9368 --- [ main] o.apache.catalina.core.StandardService : Starting service [Tomcat]
2022-08-13 10:24:14.553 INFO 9368 --- [ main] org.apache.catalina.core.StandardEngine : Starting Servlet engine: [Apache Tomcat/9.0.65]
2022-08-13 10:24:14.619 INFO 9368 --- [ main] o.a.c.c.C.[Tomcat].[localhost].[/] : Initializing Spring embedded WebApplicationContext
2022-08-13 10:24:14.619 INFO 9368 --- [ main] w.s.c.ServletWebServerApplicationContext : Root WebApplicationContext: initialization completed in 1433 ms
2022-08-13 10:24:14.970 WARN 9368 --- [ main] .s.s.UserDetailsServiceAutoConfiguration :
Using generated security password: 22bd9a92-2130-487c-bf59-71e61c8124ee
This generated password is for development use only. Your security configuration must be updated before running your application in production.
2022-08-13 10:24:15.069 INFO 9368 --- [ main] o.s.s.web.DefaultSecurityFilterChain : Will secure any request with [org.springframework.security.web.session.DisableEncodeUrlFilter@22555ebf, org.springframework.security.web.context.request.async.WebAsyncManagerIntegrationFilter@36ebc363, org.springframework.security.web.context.SecurityContextPersistenceFilter@34123d65, org.springframework.security.web.header.HeaderWriterFilter@73a1e9a9, org.springframework.security.web.csrf.CsrfFilter@1aafa419, org.springframework.security.web.authentication.logout.LogoutFilter@515c6049, org.springframework.security.web.authentication.UsernamePasswordAuthenticationFilter@408d971b, org.springframework.security.web.authentication.ui.DefaultLoginPageGeneratingFilter@41d477ed, org.springframework.security.web.authentication.ui.DefaultLogoutPageGeneratingFilter@45752059, org.springframework.security.web.authentication.www.BasicAuthenticationFilter@c730b35, org.springframework.security.web.savedrequest.RequestCacheAwareFilter@65fb9ffc, org.springframework.security.web.servletapi.SecurityContextHolderAwareRequestFilter@1bb5a082, org.springframework.security.web.authentication.AnonymousAuthenticationFilter@34e9fd99, org.springframework.security.web.session.SessionManagementFilter@7b98f307, org.springframework.security.web.access.ExceptionTranslationFilter@14cd1699, org.springframework.security.web.access.intercept.FilterSecurityInterceptor@1d296da]
2022-08-13 10:24:15.127 INFO 9368 --- [ main] o.s.b.w.embedded.tomcat.TomcatWebServer : Tomcat started on port(s): 8080 (http) with context path ''
2022-08-13 10:24:15.138 INFO 9368 --- [ main] c.b.s.SecurityfilterdemoApplication : Started SecurityfilterdemoApplication in 2.477 seconds (JVM running for 2.856)
We can see the spring security-generated password. But there is also a log message
Will secure any request with [org.springframework.security.web.session.DisableEncodeUrlFilter@22555ebf,
org.springframework.security.web.context.request.async.WebAsyncManagerIntegrationFilter@36ebc363,
org.springframework.security.web.context.SecurityContextPersistenceFilter@34123d65,
org.springframework.security.web.header.HeaderWriterFilter@73a1e9a9,
org.springframework.security.web.csrf.CsrfFilter@1aafa419,
org.springframework.security.web.authentication.logout.LogoutFilter@515c6049,
org.springframework.security.web.authentication.UsernamePasswordAuthenticationFilter@408d971b,
org.springframework.security.web.authentication.ui.DefaultLoginPageGeneratingFilter@41d477ed,
org.springframework.security.web.authentication.ui.DefaultLogoutPageGeneratingFilter@45752059,
org.springframework.security.web.authentication.www.BasicAuthenticationFilter@c730b35,
org.springframework.security.web.savedrequest.RequestCacheAwareFilter@65fb9ffc,
org.springframework.security.web.servletapi.SecurityContextHolderAwareRequestFilter@1bb5a082,
org.springframework.security.web.authentication.AnonymousAuthenticationFilter@34e9fd99,
org.springframework.security.web.session.SessionManagementFilter@7b98f307,
org.springframework.security.web.access.ExceptionTranslationFilter@14cd1699,
org.springframework.security.web.access.intercept.FilterSecurityInterceptor@1d296da]
The above list shows the number of filters in the chain of security filters. Spring Security automatically configures these filters on every incoming request. Filters are executed in that specific order. One can change the order by the configuration of modules.
Security Filters
Now, we have covered the basics of Spring Security Filters. Let’s look at how these filters are stacked with Servlet filters and Spring’s application context.
DelegatingFilterProxy is the filter that acts as a bridge between the Servlet container’s life cycle and Spring’s application context. Once the initial request comes to DelegatingFilterProxy filter, it delegates the request to Spring Bean to start the security filter flow.
FilterChainProxy is the filter that contains information about all the security filters. It matches the incoming request with URI mapping and accordingly passes the request to that filter. DelegatingFilterProxy start the security flow by calling FilterChainProxy.
FilterChainProxy determines which SecurityFilterChain to call from the incoming request. One can implement RequestMatcher interface to create rules for your security filter chain.
As shown above, Spring Security contains different security filters, but there are certain filters that are critical when the incoming request passes through them.
UsernamePasswordAuthenticationFilter – If your application is configured for Username and Password, the request will pass through this filter to process username/password authentication.
SecurityContextPersistenceFilter – Once the user is authenticated, the user information is configured in a security context. This filter populates SecurityContextHolder.
Conclusion
In this post, I showed the details of the Spring Security Filter Chain and how it works. Once you understand these fundamentals, it becomes easier to configure and customize Spring Security for your web application.
In this post, we will build a simple microservice using an Event Source architecture pattern. Previously, I discussed Event-Driven architecture. This post will be more elaborative on how one can build a microservice with this pattern. But before we do that, let’s look at some fundamentals.
Event Sourcing
Event sourcing is an append-only log of events. We store the events and also the context of those events. Every service will store the data as events.
Usually, the data is related to changes to the business/domain entity. Every change is captured as an event. The service stores the event in a database with all the required context. This allows rebuilding of the current state of the entity.
Auditing is one of the benefits of event sourcing. The key difference between audit logs and event sourcing is the context. In audit logs, there is no context of changes to entities. But, with event sourcing, context is part of the storage.
Event Store
Event Store is an event database. A system records each change to the domain in the database. Event store stores immutable events. Events are by nature immutable. We can rebuild the entity state using the event store.
To give an example – consider if you swipe a debit card to buy something and the money from your bank account is deducted.
In this scenario, a system will trigger an event CardSwiped. We will store the event CardSwiped with details like date, price, and merchant details. For any reason, if the transaction has to be reversed, the system will send another event instead of changing anything with the first event. Reversing of a transaction is itself an event. So, it will trigger CardTransactionReverse event.
In short, we did not change CardSwiped as an event in the database, but we changed the effect it caused.
Streams
Within the event store, the events for a domain live in an event stream. One can rebuild the state of the domain by reading all the events from a stream.
As the name goes, streams are incoming events. The sequence of events matters, especially if the state of the domain is going to change. A unique number or numeric value represents the position of the event.
Benefits of Event Sourcing
There are a number of benefits of using event sourcing. Here goes the list
Auditing
Asynchronous communication
Fault tolerance
Easier to rebuild the state
Observability
Service autonomy – If a service with event sourcing is down, dependent services can catch up when the service is back.
Microservice Example
In this example, we will look at when a customer orders for food delivery.
Customer orders for food. Order service takes up the order and runs some validation before creating order.
Order service will call Consumer service to verify consumer details.
Order service will call Kitchen service to create food order ticket.
Order service will call Accounts service for credit card authorization.
If everything went successfully, order service will create an order.
For demo purposes, we won’t detail each piece of this example. I will show how an order service will create an order.
In event sourcing, each event is a domain event. To understand domain event better, you should check domain-driven design.
Domain Event
In event sourcing, we represent domain entity or aggregate with domain event. The usual approach to name an event is to use past-participle verb. Example – OrderCreatedCreditCardAuthorized.
These domain events include information about the domain. It represents the state changes for the domain entity. It also includes Event id, timestamp, user information.
In our microservice example, we will be using number of domain events – OrderCreated, CreditCardAuthorized, OrderRejected, OrderShipped.
Whenever a consumer places an order to buy food, either the client will send a request for order. For managing orders, we have a microservice OrderService. OrderService can store the incoming order request as is in database. OrderService will need to inform KitchenService about the order, so it can prepare the food. In mean time, if we receive some update to original order, it will overwrite the details of initial order. We lose important state changes.
Now, comes the event sourcing.
With event sourcing, we can create domain events and these events track the state of domain. When a client sends initial request, the event OrderCreated tracks the order creation. Before order is getting ready for KitchenService , if a customer updates or cancels the order, we will have OrderUpdated OR OrderCanceled events.
We store each of these events in event store. Event store allows to create object by applying those events.
In many instances, aggregates can be tightly coupled. To avoid the tight coupling, each aggregate can publish a domain event while storing the event data in its store. This store acts as audit log as well as provides a capability to rebuild the state.
Order service will then publish the event OrderCreated through message broker. Various services like Kitchen service and Accounts Service will subscribe to the event. They will perform their work asynchronously. Kitchen service will then perform consumer verification and if successful, it will send ConsumerVerified event. Accounts Service will equally create CreditCardAtuhorized.
CQRS Pattern
When using event sourcing as architecture pattern, you will also use CQRS (command query responsibility segregation) pattern.
In traditional database application, we use CRUD operations to manage data. CQRS conceptually separates the model for update and display. Command acts for create, update and delete and Query acts for fetching the data from database.
In our example for Order Service, when a user orders for food delivery, client sends a request. We use request details to call command CreateOrder . Order repository uses this command to save order details. And then orderCreated event is emitted to event queue. Subscribed services consume this event to further processing.
Idempotency Handling
Every subscriber service has to implement idempotency for consuming the events. It is possible that publishing service publishes the event more than once. If the subscriber has already processed that event before, then subscriber should ensure to not change domain state if the event comes second time.
Usual solution is to pass a unique id in each event. Subscriber then stores the event id in database table ProcessedMessages as unique. If a subscriber consumes the event with the same id, there will be an error when storing that id in the database table.
Conclusion
In this post, I gave a detail account of event sourcing. Event sourcing is a great way to write micro services. Especially, it solves the problem for data consistency. Whenever a state of entity is changed, a new event is added to the list of events. It also helps in avoiding the object-relational impedance mismatch problem.