In this post, I show how to create long-running background jobs using Trigger.dev and NestJS framework.
I have been playing around on how to write cron jobs that listen and do things on certain events. You can write a simple cron job that runs on a schedule to check something.
What if you want to trigger some scheduled work on some event or some webhook trigger? Can we have a long-running background job for that? Serverless frameworks like Vercel offer edge functions, but they are limited by timeout, so they don’t serve the purpose of long-running. Let’s dive deep into building a background job with trigger dev and NestJS.
Set up NestJS Application
Here are some of my previous posts where I have covered about setting up a NestJS application.
- Upload file to S3 using NestJS Application
- Using Bull Queues in NestJS Application
To demonstrate this particular post, I have a simple NestJS application running.
Configure Trigger.dev
Let’s set up trigger.dev for a long-running background job. We will need trigger.dev sdk in our NestJS project.
npm install @trigger.dev/sdk @trigger.dev/nestjs @nestjs/config
If you have not created an account on trigger.dev, you can create one now. They offer a hobby plan that does not charge anything. You can also self-host trigger.dev.
Once you have signed up, you will need to get API KEY and API URL.
Set the environment variable in your NestJS project
TRIGGER_API_KEY=api_key_value_from_trigger_dev
TRIGGER_API_URL=https://cloud.trigger.dev
Create a Trigger Module in NestJS
In your main module, add a new module to configure trigger with API and URL.
TriggerDevModule.registerAsync({
    inject: [ConfigService],
    useFactory: (config: ConfigService) => ({
      id: 'betterjavacode',
      apiKey: config.getOrThrow('TRIGGER_API_KEY'),
      apiUrl: config.getOrThrow('TRIGGER_API_URL'),
      verbose: false,
      ioLogLocalEnabled: true,
    }),
  }),
Define a job
Once we have the trigger module set up, we will define a background job. To be able to set up a job, we will create a new controller job.controller.ts.
import { Controller, Get } from "@nestjs/common";
import { InjectTriggerDevClient } from "@trigger.dev/nestjs";
import { TriggerClient, eventTrigger } from "@trigger.dev/sdk";


@Controller()
export class JobController {
    constructor(
        @InjectTriggerDevClient() private readonly client: TriggerClient
    ) {
        this.client.defineJob({
            id: 'test-job-one',
            name: 'Sample Job One',
            version: '0.0.1',
            trigger: eventTrigger({
                name: 'test.event',
            }),
            run: async (payload, io, ctx) => {
                await io.logger.info('Hello world!', { payload });

                return {
                    message: `Hello world - ${payload.name}!`,
                };
            }
        });
    }

    @Get('/get-simple-job-trigger')
    getSimpleJobTrigger(): string {
        return `running trigger.dev with client-id ${this.client.id}`;
    }
}
Anyhow, this might be a lot to understand. So, I will go over this controller in steps.
With trigger.dev, one can define a job. The job contains a trigger and a task.
Trigger is either an event, a scheduler, or a manual that triggers the job.
A task is what the job executes on triggered. This is the basic block of run defined within the job.
As shown in the code, I have defined a job with id test-job-one that gets triggered with an event trigger test.event and when triggered, it runs a job that returns Hello world - ${payload.name}.
Now, to be able to create this job and run this job on a server, we have to create this job in trigger.dev app. One way to define is to configure this in package.json
"trigger.dev": {
    "endpointId": "betterjavacode"
  }
Once you run the app, you will see the job created in trigger.dev portal
Running the app
While running the app, make sure to run both nestjs app and trigger.dev.
npm run start – to start the nestjs application
npx @trigger.dev/cli@latest dev --port 3001 – to start trigger dev app
How to trigger the job
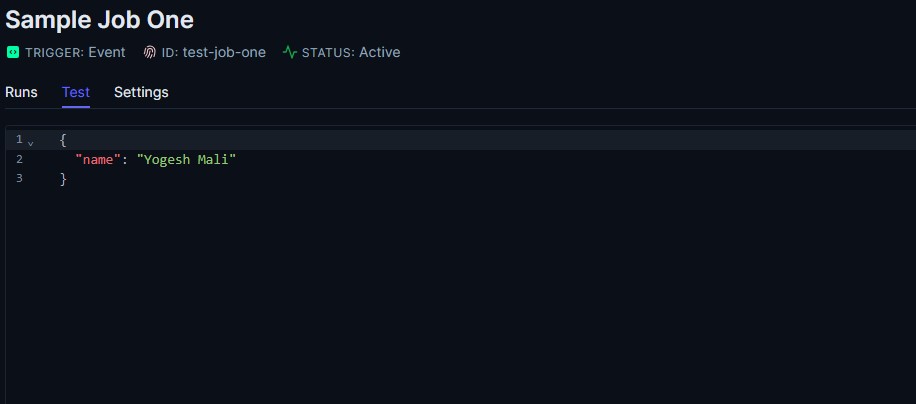
trigger.dev provides a test run option. In trigger.dev portal, go to your job and see the section for test and you will see an option to pass payload to your job. And then press Run button.

I like the flexibility of trigger.dev on defining the job. Another feature I love about trigger.dev is that they have various integrations available like OpenAI, Linear, Slack etc. If you need to develop some automated workflow, trigger.dev is a great choice to build that workflow.
Conclusion
In this post, I showed how to use trigger.dev to create a long-running background job with NestJS application. Hopefully, I will cover a real example of a workflow with trigger.dev in upcoming posts.