Tag Archives: Java

Techstack Framework for RentersFeedback

As a developer, we make different choices based on what is available to us and what we know. But are those choices always better? They may not or they may. It really depends. In this post, I describe the techstack framework that I used to build Renters Feedback.

You can read my post, how I came up with an idea to build an application for renters feedback.

I wanted to describe the process of the choices I made to choose a tech stack framework for building the application. Considering my expertise in Spring Boot, it was a default choice to use to build this application. There are other factors I took into account like the ease of coding, ease of deploying as a microservice-based application in the cloud, and docker.

Techstack Framework for Renters Feedback

Development Framework For Renters Feedback

For developing the application, my focus was on the re-usability of code. Since I have written few applications as part of this blog using Spring Boot, there was authentication, login forms, sign up forms, most of that code was readily available. One thing I have to think through for RentersFeedback was database modeling.

Database Framework for Renters Feedback

For developing a database based application, I used mysql as a development database. In production, I changed that to postgresql . 

Why database change? 

Heroku support for mysql wasn’t straightforward, so I preferred what was available by default and it was postgresql. I have to do a few changes to mysql scripts. I could have automated these scripts through liquibase, but I preferred not to for the first version of the product. In the future, when I plan to add more changes to the database model, I will add liquibase-based scripts.

Authentication Scheme

There were some questions about why a user needs to login on a RentersFeedback website. Well, someone has to post those reviews before people can browse it. You need to login if you want to post a review.

The easiest choice was to have form-based login even though it is getting old and not safe. I still feel most users would use email to login. User passwords are stored in an encrypted and hashed format in the database.

Another mechanism, I decided to add, was OAuth2 OpenId protocol by using Google API for the same. It was easy to implement and something I have expertise in.

I could add other social logins, but I prefer to keep it simple and if the need arises, I will add those logins in the future.

Using Google API, made me use Redis Cache. I wasn’t planning to use cache since the application is still in nascent stages, but now it is there, so future scaling would be easier from a performance perspective.

User Interface

The user interface was built using Spring Boot provided thymeleaf templates along with Twitter’s Bootstrap CSS library and javascript library. For the search feature, I have used javascript library of Google search APIs.

After deploying the application on Heroku, I came across a few issues about having forms available publicly. To avoid spams, I will be adding Captcha on those forms. I will show how to use reCaptcha APIs in the next post.

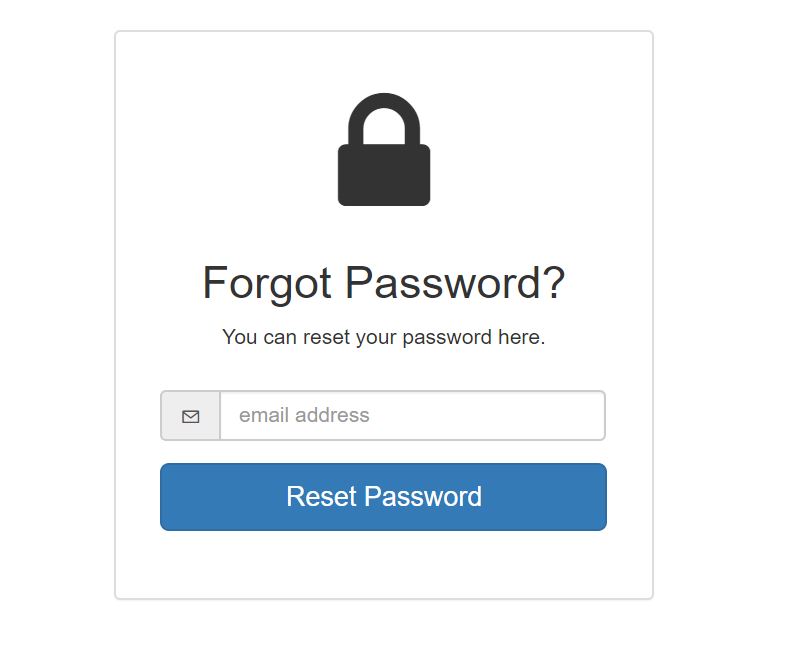
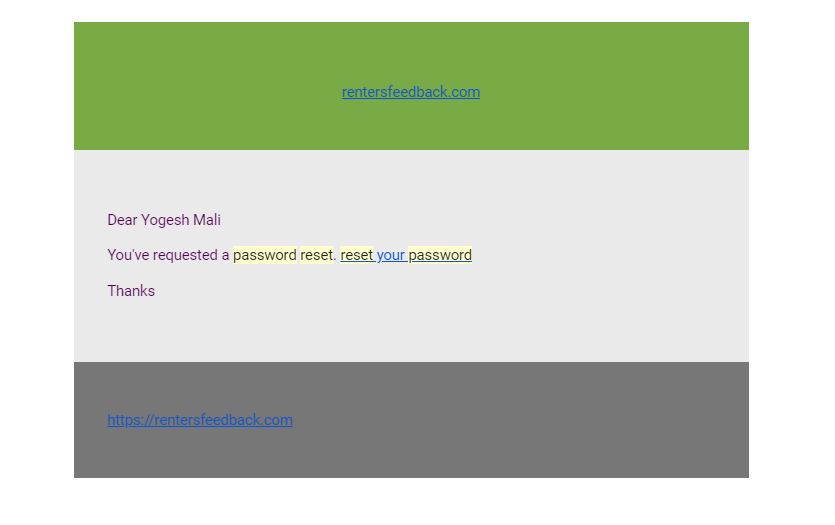
To allow users to reset the password, I have used Spring Boot Email system. This was an easy implementation once you know how the forgot your password flow works.

Deployment Environment

I used Heroku to deploy my application. Heroku has great documentation. It’s very easy to sync up with your GitHub repository. So if you push your changes to GitHub, it will sync up to build and deploy on Heroku.

Questions

Choosing the right tech stack framework for your application can be a difficult task if you are a beginner.  Since I have experience in building applications, choosing this techstack framework for Renters Feedback was a straightforward choice. If you have any questions about implementation, why I used certain technology, and how it can be improved, you can post a comment on this blog and I will answer those questions.


RentersFeedback.com

RentersFeedback is a brainchild from a tweet that a friend tweeted back in August:

Tweet from a renter

Based on this tweet, I thought it would be nice if renters have some say about landlords. Around the same time, my girlfriend was looking for an apartment/house to rent. Even though we found a place, we were not sure if it’s a good place. And there were no reviews about this place. On the first impression, the house didn’t look like a place where anybody has lived in a long time, but we made our decision and went ahead with it. It would have been nice if there was a review of this place.

I am sure when most people are looking for places to rent, they use services like Padmapper or Zillow which offers the easiest way to find places based on area, requirements, budget, other facilities. But none of these applications offer a review system.

What this will solve?

Renters Feedback will solve the much-needed place to provide reviews about the places that people are renting. This will help future renters to look for good places to rent. This will also make landlords and rental management companies more accountable. I hope Renters Feedback can help renters with reviews for the places they want to rent.

What about Yelp?

Yelp.com has been providing reviews of restaurants, small businesses, and other things, but rarely of a standalone house to be rented or a rental management company. Yelp has done a tremendous job, but it lacks in this one area.

Why an application with a single functionality?

Less is more. Simple functionality matters in long terms than a complicated one. In marketing, there is a term affordance that refers to the perceived and actual properties of the thing, primarily those fundamental properties that determine how the thing could be used. A single functionality of the application will help users to navigate and use the application efficiently.

Techstack

To build RentersFeedback.com, I have used Spring Boot Microservice based architecture. I have implemented the current user interface using Twitter Bootstrap, CSS, Javascript, Google Javascript API, and Thymeleaf. Backend is written using Java and database supported.

Using Redis for caching, Google for OAuth2 authentication along with regular authentication.

Heroku.com is my choice of the cloud platform to launch the application. It offers an easy way to assemble all the needed services like database, Redis, and the server itself.

One future change for this might be to move the user interface to reactjs. Something that is currently I am working on.

Feedback

I would love it if you could use the application and would appreciate any feedback.  Subscribe to my blog to find out more about renters’ feedback.


Session Management with Spring-Session and JDBC

User session management is vital to keep user state in an application. The session helps to keep track of where the user is currently and if he comes back to check the application, it can be retrieved in a similar state. In this post, I will show how to use the Spring session with the database to maintain session data.

Spring Session

Spring session offers APIs to manage user sessions. This gives the flexibility to build an enterprise-level application using Spring Boot and still segregating with Spring Session. Another advantage of using Spring session is that it offers different storage options. You can store the session data in redis, database using JDBC or in-memory. Since we are able to store the session data in database, session data is not lost if application shuts down or crashes. This helps to manage user session iteratively.

In this post, I will show how I have used Spring session in my application Renters Feedback.

Create a Spring Boot based application

I will not be showing how to create a spring boot based application. The assumption is you know the basics of Spring Boot. Once you create a maven-based or Gradle-based Spring boot application, you can include a dependency for Spring session.

org.springframework.session:spring-session-jdbc:2.1.6.RELEASE

Configure Storage Type

With the Spring session, you have multiple options to configure the storage type. For this post, I will be showing how to use a database with JDBC to store user session data. With setting application.properties you can create required session tables on the fly OR you can create them before starting your application, so you don’t have to create them always.

From a production system perspective, I prefer to create tables while setting up an application once and never worry about it.

So before we can use the spring session, create the required database tables in your choice of database. In this post, I will be using mysql for database.

Create the following two database tables in your application database

create table SPRING_SESSION (
primary_id CHAR(36) NOT NULL,
session_id CHAR(36) NOT NULL,
creation_time BIGINT NOT NULL,
last_access_time BIGINT NOT NULL,
max_inactive_interval INT NOT NULL,
expiry_time BIGINT NOT NULL,
principal_name VARCHAR(100),
CONSTRAINT spring_session_pk PRIMARY KEY (primary_id)
);

create table SPRING_SESSION_ATTRIBUTES (
session_primary_id CHAR(36) NOT NULL,
attribute_name VARCHAR(200) NOT NULL,
attribute_bytes BLOB NOT NULL,
CONSTRAINT spring_session_attributes_pk PRIMARY KEY (session_primary_id, attribute_name),
CONSTRAINT spring_session_attributes_fk FOREIGN KEY (session_primary_id) REFERENCES SPRING_SESSION(primary_id) ON DELETE CASCADE
);


Configuring your application.properties  as follows:

spring.datasource.url=jdbc:mysql://127.0.0.1/sampledb?autoReconnect=true&useSSL=true
spring.datasource.username = sa
spring.datasource.password=*********
spring.datasource.driver-class-name=com.mysql.jdbc.Driver
spring.session.store-type=jdbc
spring.session.jdbc.initialize-schema=never
spring.session.jdbc.table-name=spring_session

One reason we specified spring.session.jdbc.initialize-schema=never is because we are manually creating the database tables.

Now to use Spring session in our application, we will configure Spring security and enable @EnableWebSecurity . Basically this will allow us to have a form-based authentication and on authentication, we can have a valid session created and stored in the database for logged in user.

I will not be showing how to enable Spring Security, you can read my old post about Using Spring Security in Spring Boot application.

Configuring JDBC HTTP Session

One key thing to do as part of this implementation is to enable Spring Session in the application by using annotation @EnableJdbcHttpSession as shown below:

@SpringBootApplication
@EnableJdbcHttpSession
public class HomeApplication extends SpringBootServletInitializer
{
	public static void main(String[] args)
	{
		SpringApplication.run(HomeApplication.class, args);
	}

}

As per Spring documentation here Spring Session, the annotation @EnableJdbcHttpSesion adds a bean with the name of springSessionRepositoryFilter . This filter handles replacing HTTP session implementation with Spring Session.

Running the application

Now to see the entire application, we can see the following recording to see how spring boot based application creates the session and stores in the database.

In conclusion, we showed how to implement session management using the Spring Session.

References

  1. Spring Session – Spring Session
  2. Spring Session with JDBC – Spring Session with JDBC


Forgot Password Feature in Spring Boot Application

In this post, we will show how to implement a forgot password feature for your Spring Boot Application. In my old post, I had shown how to create social login for an application.

Most web applications will have forgot password page and there are different policies about password creation and resetting the password. Overall, you can assume that user will forget a password and will need to reset password.

Flow for Forgot Password

  1. User visits login screen and clicks on forgot password option.
  2. User enters email address in forgot password box.
  3. On Server side, we verify if a user with that email exists or not.
  4. On Server side, we create a time-bound security reset token affiliated with that user and send it in an email, provided that the user exists.
  5. User receives an email to reset password.
  6. Once the user clicks the reset password link which includes the reset token.
  7. User redirects to a page where the user can reset the password.
  8. Then the user submits a new password along with reset token. Based on reset token, we first verify if the user is correct and then saves the new password.
  9. User redirects to login page.

Once now, we have described the flow, we can show how to implement this feature.

Forgot Password UI

A screen where user will enter email address to reset the password, will look like below:

Feature of Forgot Password

Forgot Password

Once the user enters his email address, server side implementation will validate if a user with that email exists or not. In LoginController , this posting of Reset Password will look like below:


        String email = ServletUtil.getAttribute(request, "email");
        User user = userRepository.findUserByEmail(email);

        if(user == null)
        {
            model.addAttribute("error", "We didn't find this user");
            return "forgotpassword";
        }
        PasswordResetToken token = new PasswordResetToken();
        token.setToken(UUID.randomUUID().toString());
        token.setUser(user);
        token.setExpiryDate(30);
        passwordResetTokenRepository.save(token);
        
        Mail mail = new Mail();
        Map<String, Object> modelObj = new HashMap<>();
        modelObj.put("token",token);
        modelObj.put("user", user);
        String url =
                request.getScheme() + "://" + request.getServerName() + ":" + request.getServerPort();
        modelObj.put("resetUrl", url + "/resetpassword?token=" + token.getToken());
        mail.setModel(modelObj);
        emailService.sendEmail(mail);

As you see in this code token object is one-to-one mapped with user.  Once the user submits email address, we send him a password reset email with URL.

So this email will look like below:

Password Reset Email

Once the user clicks on the link from email, user will be redirected to a form to submit new password. When displaying the form, first the reset token will be validated if it has not expired and exists. GET request for reset form will present the form.

POST request will submit the form to reset user password.


    @GetMapping
    public String getPasswordResetPage(@RequestParam(required=false) String token, Model model)
    {
        PasswordResetToken passwordResetToken = passwordResetTokenRepository.findByToken(token);
        if(passwordResetToken == null)
        {
            model.addAttribute("error","Could not find reset token");
        }
        else if(passwordResetToken.isExpired())
        {
            model.addAttribute("error","Reset Token is expired");
        }
        else
        {
            model.addAttribute("token",passwordResetToken.getToken());
        }
        return "resetpassword";
    }

    @PostMapping
    public String handlePasswordReset(HttpServletRequest request, Model model)
    {
        String token = ServletUtil.getAttribute(request, "token");
        PasswordResetToken passwordResetToken = passwordResetTokenRepository.findByToken(token);
        User user = passwordResetToken.getUser();
        String password = ServletUtil.getAttribute(request, "password");
        String confirmPassword = ServletUtil.getAttribute(request, "confirmPassword");
        
        user.setPassword(updatedPassword);
        user.setPasswordConfirm(updatedPassword);
        userRepository.save(user);
        passwordResetTokenRepository.delete(passwordResetToken);

        return "redirect:/login?resetSuccess";

    }

After new password is saved, the reset token is deleted, so it can’t be reused.

Conclusion

In this post, we showed how to implement the user story of forgot password. There are usually different possibilities to reset the password. It mostly depends on what password policies you adapt.

References

  1. Forgot Password Feature – Forgot Password


How to set up IIS as Reverse Proxy to Jetty

Recently I came across an interesting scenario where we have to redirect an old application to a new application. Mainly this was to support backward compatibility with the new application if any existing customers start using it. So mostly these customers don’t have to change anything on their end, but just use the old product that could still redirect to a new application. The old application was using IIS Webserver. In this post, I will show how to set up IIS as a reverse proxy to jetty.

Scenario

The use case is that an application https://abccompany.com/salesapp is running as an ASP.NET application behind IIS web server. The new application https://abccompany.com/newsalesapp is built using JAVA and running on Jetty web server.

Some of the existing customers are still using the old application. For easiest way to make them still use new application is redirect the requests for old application to new application.

Implementation

We implemented this measure with only purpose of backward compatibility and reducing customer’s issues if they want to use new application. It helps them how simple and smoothly this can take place.

To make IIS as a proxy to Jetty web server, we will need Application Request Routing and URL Rewrite module installed on IIS. Remember these modules are free, but not installed by default.

IIS Proxy Settings

Once you have Application Request Routing module installed, go to your IIS Manager for your server and open the module.

In Server Proxy Settings, configure to Enable Proxy and keep rest of the settings as it is. The picture below shows the configuration:

Proxy Settings

Rewrite/Redirect Rules

Now we will use URL Rewrite module for the site that is part of IIS server. Once you open URL rewrite module, click on Add Rule and it will show the following screen to create rule, so select Blank Rule option

Blank Rule

Add a name for rule in new window of blank rule. Now you can add pattern of your old application URL that will be redirected, with action type Redirect to new REDIRECT URL.

Pattern for old URL will be regular expression, so make sure you use right expression for your application’s URL. In my case, it will look like below:

Rule

This rule will take of any query string parameters you have in old application URL and will add them in the new URL.

Example. https://abccompany.com/salesapp?productid=1&customerid=2 will become https://abccompany.com/newsalesapp?productid=1&customerid=2. Of course, the assumption is that your new application is using the same parameter with same names.

Conclusion

So this was a simple way to redirect any request from IIS server to Jetty. This will simply great if you only have REDIRECT OR GET requests. What if a user is submitting a form OR using a POST request. In that case, we will need some modification.

  1. Application Pool for your site should be classic.
  2. Instead of redirect, you should be writing rewrite rule type.

References

  1. IIS as Reverse Proxy with application request routing and URL rewrite – Request routing