In this post, I will show how we can use the Circuit Breaker pattern in a Spring Boot Application. When I say Circuit Breaker pattern, it is an architectural pattern. Netflix had published a library Hysterix for handling circuit breakers. As part of this post, I will show how we can use a circuit breaker pattern using the resilence4j library in a Spring Boot Application.
In other news, I recently released my book Simplifying Spring Security. If you are interested to learn about Spring Security, you can buy it here.
Image from Pixabay – By Jürgen Diermaier
What is Circuit Breaker?
The concept of Circuit Breaker comes from Electrical Engineering. In most electricity networks, circuit breakers are switches that protect the network from damage caused by an overload of current or short circuits.
Similarly, in software, a circuit breaker stops the call to a remote service if we know the call to that remote service is either going to fail or time out. The advantage of this is to save resources and be proactive in our troubleshooting of the remote procedure calls.
The circuit breaker makes the decision of stopping the call based on the previous history of the calls. But there are alternative ways how it can handle the calls. Usually, it will keep track of previous calls. Suppose 4 out of 5 calls have failed or timed out, then the next call will fail. This helps to be more proactive in handling the errors with the calling service and the caller service can handle the response in a different way, allowing users to experience the application differently than an error page.
Another way a circuit breaker can act is if calls to remote service are failing in particular time duration. A circuit breaker will open and will not allow the next call till remote service improves on error.
Resilience4J Library
We have our code which we call remote service. The circuit breaker module from resilience4j library will have a lambda expression for a call to remote service OR a supplier to retrieve values from the remote service call. I will show this as part of the example. The circuit breaker decorates this remote service call in such a way that it can keep track of responses and switch states.
Different configurations of Resilience4j Library
To understand the circuit breaker concept, we will look at different configurations this library offers.
slidingWindowType() – This configuration basically helps in making a decision on how the circuit breaker will operate. There are two types COUNT_BASED and TIME_BASED. COUNT_BASED circuit breaker sliding window will take into account the number of calls to remote service while TIME_BASED circuit breaker sliding window will take into account the calls to remote service in certain time duration.
failureRateThreshold() – This configures the failure rate threshold in percentage. If x percentage of calls are failing, then the circuit breaker will open.
slidingWindowSize() – This setting helps in deciding the number of calls to take into account when closing a circuit breaker.
slowCallRateThreshold() – This configures the slow call rate threshold in percentage. If x percentage of calls are slow, then the circuit breaker will open.
slowCallDurationThreshold – Time duration threshold about which calls are considered slow.
minimumNumberOfCalls() – A minimum number of calls required before which circuit breaker can calculate the error rate.
ignoreException() – This setting allows you to configure an exception that a circuit breaker can ignore and will not count towards the success or failure of a call of remote service.
waitDurationInOpenState() – Duration for which the circuit breaker should remain in the open state before transitioning into a half-open state. The default value is 60 seconds.
Count-Based Circuit Breaker
While using resilience4j library, one can always use the default configurations that the circuit breaker offers. Default configurations are based on the COUNT-BASED sliding window type.
So how do we create a circuit breaker for the COUNT-BASED sliding window type?
      CircuitBreakerConfig circuitBreakerConfig = CircuitBreakerConfig.custom()
                .slidingWindowType(CircuitBreakerConfig.SlidingWindowType.COUNT_BASED)
                .slidingWindowSize(10)
                .slowCallRateThreshold(65.0f)
                .slowCallDurationThreshold(Duration.ofSeconds(3))
                .build();

        CircuitBreakerRegistry circuitBreakerRegistry =
                CircuitBreakerRegistry.of(circuitBreakerConfig);

        CircuitBreaker cb = circuitBreakerRegistry.circuitBreaker("BooksSearchServiceBasedOnCount");
In the above example, we are creating a circuit breaker configuration that includes a sliding window of type COUNT_BASED. This circuit breaker will record the outcome of 10 calls to switch the circuit-breaker to the closed state. If 65 percent of calls are slow with slow being of a duration of more than 3 seconds, the circuit breaker will open.
CircuitBreakerRegistry is a factory to create a circuit breaker.
Time-Based Circuit Breaker
Now on Time-Based circuit breaker.
       CircuitBreakerConfig circuitBreakerConfig = CircuitBreakerConfig.custom()
                .slidingWindowType(CircuitBreakerConfig.SlidingWindowType.TIME_BASED)
                .minimumNumberOfCalls(3)
                .slidingWindowSize(10)
                .failureRateThreshold(70.0f)
                .build();

        CircuitBreakerRegistry circuitBreakerRegistry =
                CircuitBreakerRegistry.of(circuitBreakerConfig);

        CircuitBreaker cb = circuitBreakerRegistry.circuitBreaker("BookSearchServiceBasedOnTime");
In the above example, we are creating a circuit breaker configuration that includes a sliding window of type TIME_BASED. Circuit breaker will record the failure of calls after a minimum of 3 calls. If 70 percent of calls fail, the circuit breaker will open.
Example of Circuit Breaker in Spring Boot Application
We have covered the required concepts about the circuit breaker. Now, I will show we can use a circuit breaker in a Spring Boot application.
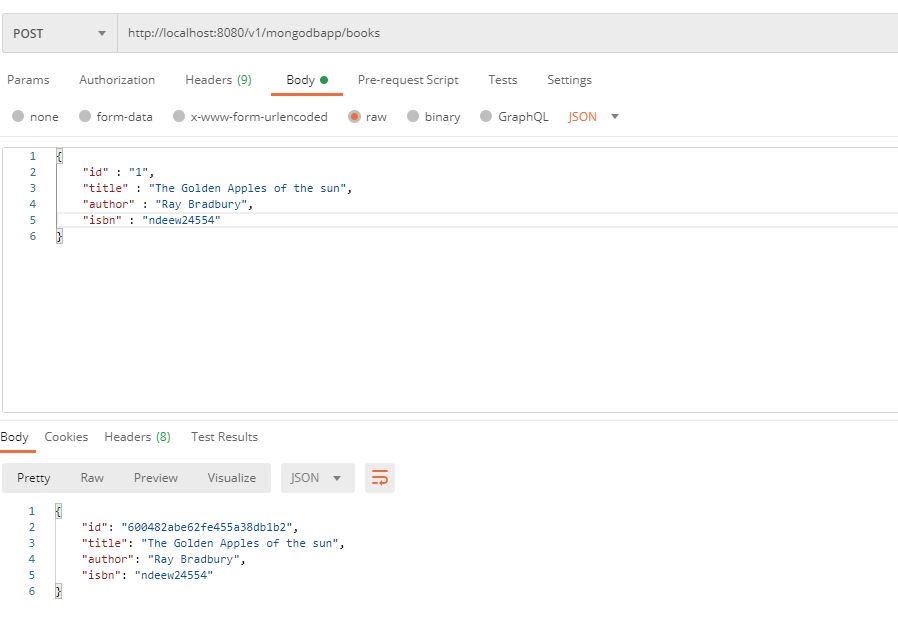
On one side, we have a REST application BooksApplication that basically stores details of library books. On the other side, we have an application Circuitbreakerdemo that calls the REST application using RestTemplate. We will decorate our REST call through the circuit breaker.
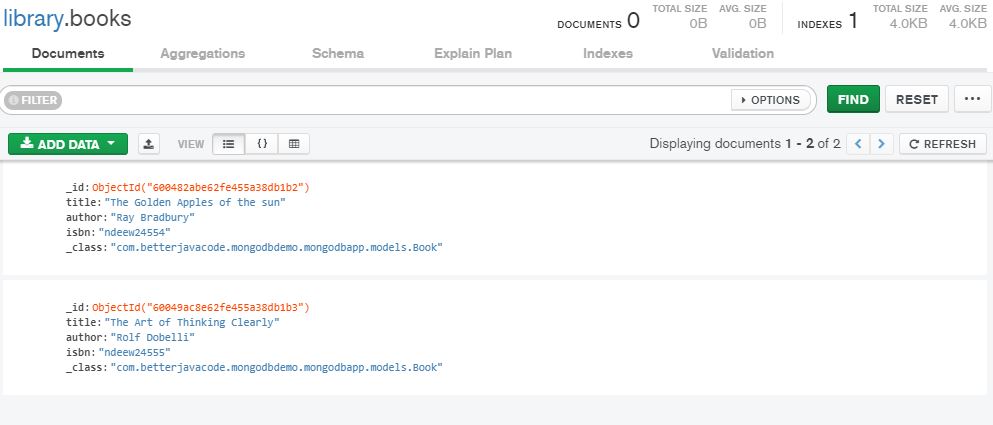
BooksApplication stores information about books in a MySQL database table librarybooks. The REST Controller for this application has GET and POST methods.
package com.betterjavacode.books.controllers;
import com.betterjavacode.books.daos.BookDao;
import com.betterjavacode.books.models.Book;
import org.springframework.beans.factory.annotation.Autowired;
import org.springframework.http.HttpStatus;
import org.springframework.http.ResponseEntity;
import org.springframework.web.bind.annotation.*;
import java.util.ArrayList;
import java.util.List;
import java.util.Optional;
@CrossOrigin("https://localhost:8443")
@RestController
@RequestMapping("/v1/library")
public class BookController
{
@Autowired
BookDao bookDao;
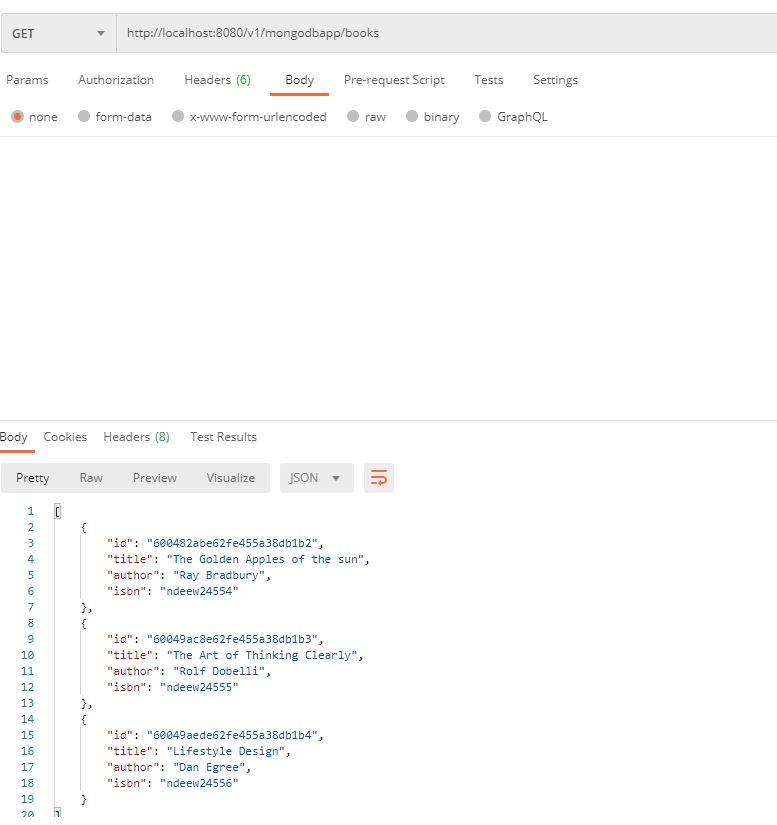
@GetMapping("/books")
public ResponseEntity<List> getAllBooks(@RequestParam(required = false) String bookTitle)
{
try
{
List listOfBooks = new ArrayList<>();
if(bookTitle == null || bookTitle.isEmpty())
{
bookDao.findAll().forEach(listOfBooks::add);
}
else
{
bookDao.findByTitleContaining(bookTitle).forEach(listOfBooks::add);
}
if(listOfBooks.isEmpty())
{
return new ResponseEntity<>(HttpStatus.NO_CONTENT);
}
return new ResponseEntity<>(listOfBooks, HttpStatus.OK);
}
catch (Exception e)
{
return new ResponseEntity<>(null, HttpStatus.INTERNAL_SERVER_ERROR);
}
}
@GetMapping("/books/{id}")
public ResponseEntity getBookById(@PathVariable("id") long id)
{
try
{
Optional bookOptional = bookDao.findById(id);
return new ResponseEntity<>(bookOptional.get(), HttpStatus.OK);
}
catch (Exception e)
{
return new ResponseEntity<>(null, HttpStatus.INTERNAL_SERVER_ERROR);
}
}
@PostMapping("/books")
public ResponseEntity addABookToLibrary(@RequestBody Book book)
{
try
{
Book createdBook = bookDao.save(new Book(book.getTitle(), book.getAuthor(),
book.getIsbn()));
return new ResponseEntity<>(createdBook, HttpStatus.CREATED);
}
catch (Exception e)
{
return new ResponseEntity<>(null, HttpStatus.INTERNAL_SERVER_ERROR);
}
}
@PutMapping("/books/{id}")
public ResponseEntity updateABook(@PathVariable("id") long id, @RequestBody Book book)
{
Optional bookOptional = bookDao.findById(id);
if(bookOptional.isPresent())
{
Book updatedBook = bookOptional.get();
updatedBook.setTitle(book.getTitle());
updatedBook.setAuthor(book.getAuthor());
updatedBook.setIsbn(book.getIsbn());
return new ResponseEntity<>(bookDao.save(updatedBook), HttpStatus.OK);
}
else
{
return new ResponseEntity<>(HttpStatus.NOT_FOUND);
}
}
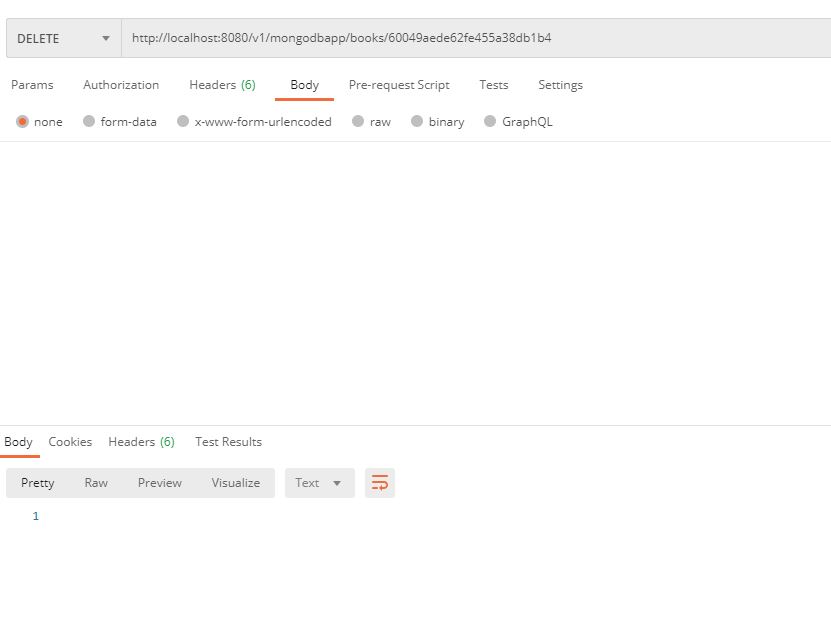
@DeleteMapping("/books/{id}")
public ResponseEntity deleteABook(@PathVariable("id") long id)
{
try
{
bookDao.deleteById(id);
return new ResponseEntity<>(HttpStatus.NO_CONTENT);
}
catch (Exception e)
{
return new ResponseEntity<>(HttpStatus.INTERNAL_SERVER_ERROR);
}
}
}
On the other side, our application Circuitbreakerdemo has a controller with thymeleaf template so a user can access the application in a browser.
For the demo purpose, I have defined CircuitBreaker in a separate bean that I will use in my service class.
    @Bean
    public CircuitBreaker countCircuitBreaker()
    {
        CircuitBreakerConfig circuitBreakerConfig = CircuitBreakerConfig.custom()
                .slidingWindowType(CircuitBreakerConfig.SlidingWindowType.COUNT_BASED)
                .slidingWindowSize(10)
                .slowCallRateThreshold(65.0f)
                .slowCallDurationThreshold(Duration.ofSeconds(3))
                .build();

        CircuitBreakerRegistry circuitBreakerRegistry =
                CircuitBreakerRegistry.of(circuitBreakerConfig);

        CircuitBreaker cb = circuitBreakerRegistry.circuitBreaker("BooksSearchServiceBasedOnCount");

        return cb;
    }

    @Bean
    public CircuitBreaker timeCircuitBreaker()
    {
        CircuitBreakerConfig circuitBreakerConfig = CircuitBreakerConfig.custom()
                .slidingWindowType(CircuitBreakerConfig.SlidingWindowType.TIME_BASED)
                .minimumNumberOfCalls(3)
                .slidingWindowSize(10)
                .failureRateThreshold(70.0f)
                .build();

        CircuitBreakerRegistry circuitBreakerRegistry =
                CircuitBreakerRegistry.of(circuitBreakerConfig);

        CircuitBreaker cb = circuitBreakerRegistry.circuitBreaker("BookSearchServiceBasedOnTime");
        return cb;
    }
I have defined two beans one for the count-based circuit breaker and another one for time-based.
The BookStoreService will contain a calling BooksApplication and show books that are available. This service will look like below:
@Controller
public class BookStoreService
{

    private static final Logger LOGGER = LoggerFactory.getLogger(BookStoreService.class);

    @Autowired
    public BookManager bookManager;

    @Autowired
    private CircuitBreaker countCircuitBreaker;

    @RequestMapping(value = "/home", method= RequestMethod.GET)
    public String home(HttpServletRequest request, Model model)
    {
        return "home";
    }

    @RequestMapping(value = "/books", method=RequestMethod.GET)
    public String books(HttpServletRequest request, Model model)
    {
        Supplier<List> booksSupplier =
                countCircuitBreaker.decorateSupplier(() -> bookManager.getAllBooksFromLibrary());

        LOGGER.info("Going to start calling the REST service with Circuit Breaker");
        List books = null;
        for(int i = 0; i < 15; i++)
        {
            try
            {
                LOGGER.info("Retrieving books from returned supplier");
                books = booksSupplier.get();
            }
            catch(Exception e)
            {
                LOGGER.error("Could not retrieve books from supplier", e);
            }
        }
        model.addAttribute("books", books);

        return "books";
    }
}
So when the user clicks on the books page, we retrieve books from our BooksApplication REST Service.
I have autowired the bean for countCircuitBreaker. For demo purposes – I will be calling the REST service 15 times in a loop to get all the books. This way, I can simulate interruption on my REST service side.
Our circuit breaker decorates a supplier that does REST call to remote service and the supplier stores the result of our remote service call.
In this demo, we are calling our REST service in a sequential manner, but remote service calls can happen parallelly also. The circuit breaker will still keep track of results irrespective of sequential or parallel calls.
Demo
Let’s look at how the circuit breaker will function in a live demo now. My REST service is running on port 8443 and my Circuitbreakerdemo application is running on port 8743.
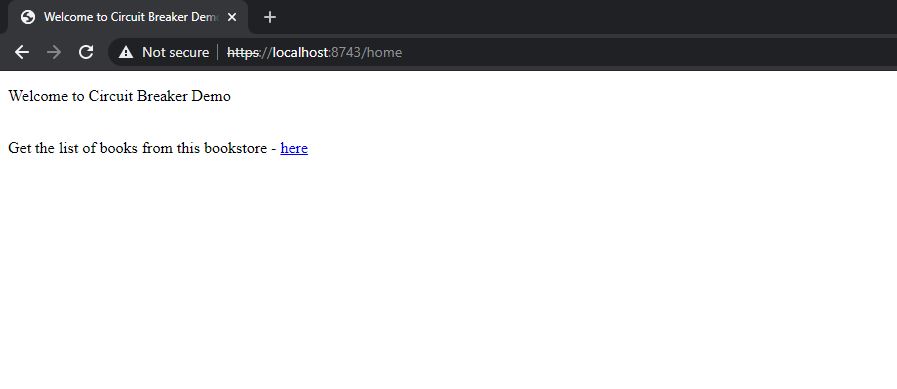
Initially, I start both of the applications and access the home page of Circuitbreakerdemo application. The home page contains the link for viewing all the books from the store.
Now to simulate some errors, I have added the following code in my RestTemplate call that basically sleeps for 3 seconds before returning the result of the REST call.
    public List getAllBooksFromLibrary ()
    {
        HttpHeaders httpHeaders = new HttpHeaders();
        httpHeaders.setContentType(MediaType.APPLICATION_JSON);

        ResponseEntity<List> responseEntity;
        long startTime = System.currentTimeMillis();
        LOGGER.info("Start time = {}", startTime);
        try
        {
            responseEntity= restTemplate.exchange(buildUrl(),
                    HttpMethod.GET, null, new ParameterizedTypeReference<List>()
                    {});
            if(responseEntity != null && responseEntity.hasBody())
            {
                Thread.sleep(3000);
                LOGGER.info("Total time to retrieve results = {}",
                        System.currentTimeMillis() - startTime);
                return responseEntity.getBody();
            }
        }
        catch (URISyntaxException | InterruptedException e)
        {
            LOGGER.error("URI has a wrong syntax", e);
        }

        LOGGER.info("No result found, returning an empty list");
        return new ArrayList<>();
    }
In short, my circuit breaker loop will call the service enough times to pass the threshold of 65 percent of slow calls that are of duration more than 3 seconds. Once I click on the link for here, I will receive the result, but my circuit breaker will be open and will not allow future calls till it is in either half-open state or closed state.
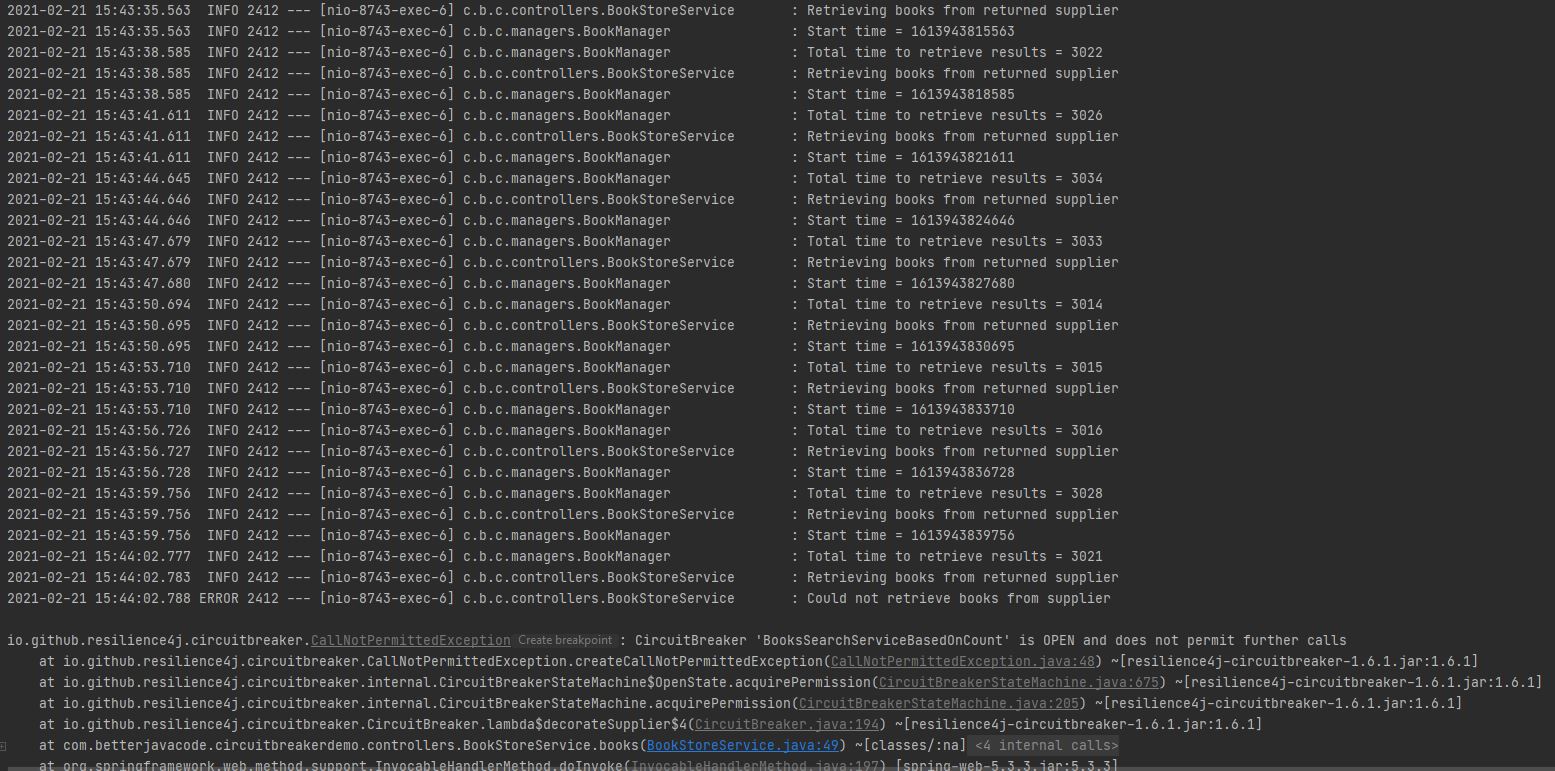
You will notice that we started getting an exception CallNotPermittedException when the circuit breaker was in the OPEN state. Also, the circuit breaker was opened when the 10 calls were performed. This is because our sliding window size is 10.
Another way, I can simulate the error by shutting down my REST service or database service. That way REST calls can take longer than required.
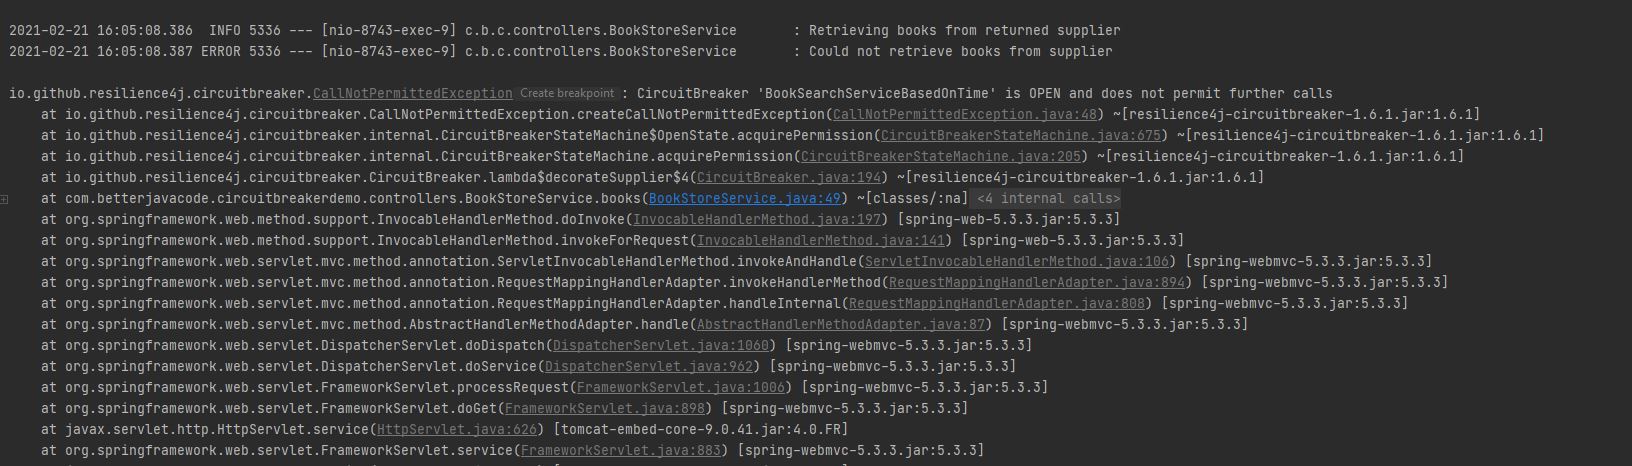
Now, let’s switch the COUNT_BASED circuit breaker to TIME_BASED circuit breaker. In TIME_BASED circuit breaker, we will switch off our REST service after a second, and then we will click on here link from the home page. If 70 percent of calls in the last 10 seconds fail, our circuit breaker will open.
Since REST Service is closed, we will see the following errors in Circuitbreakdemo application
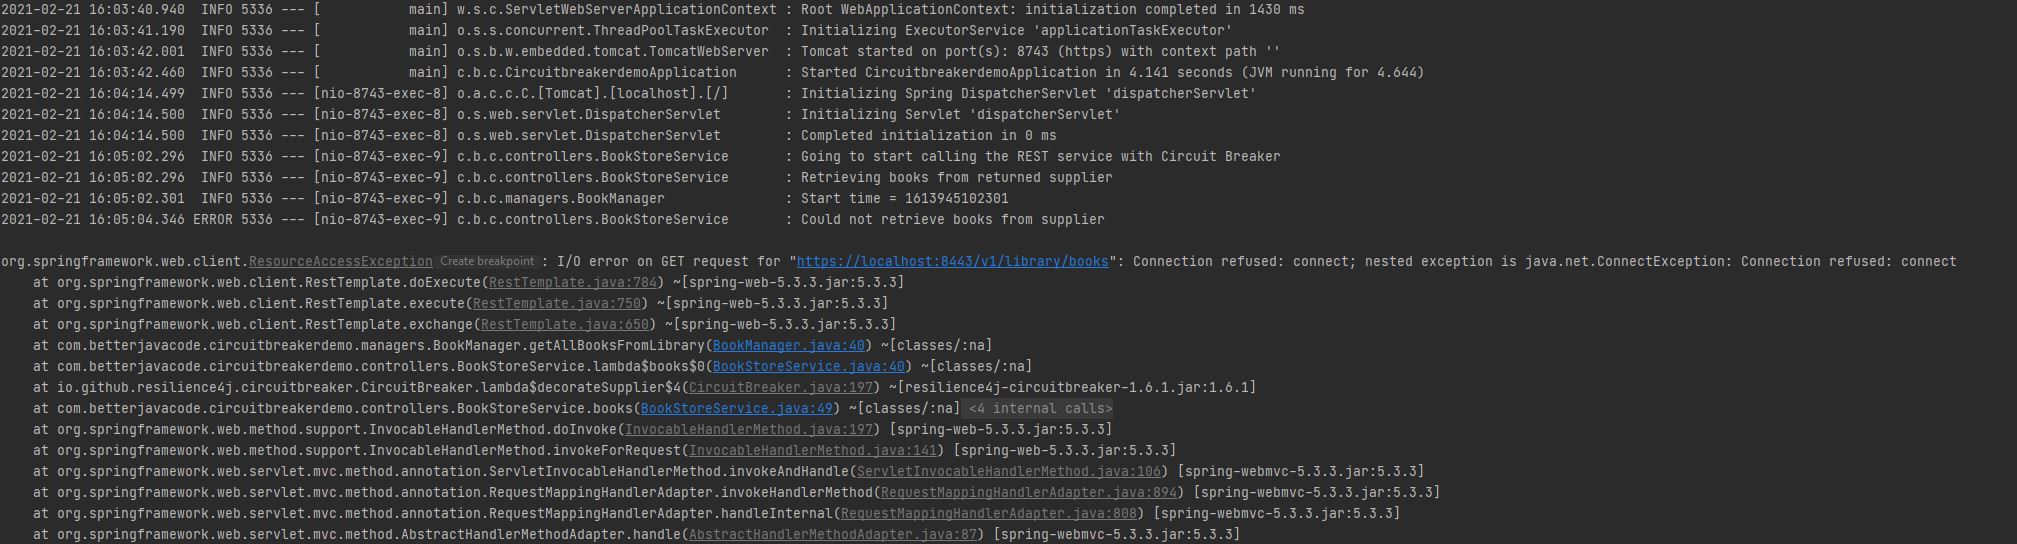
We will see the number of errors before the circuit breaker will be in OPEN state.
One configuration we can always add how long we want to keep the circuit breaker in the open state. For the demo, I have added the circuit breaker will be in an open state for 10 seconds.
How to handle OPEN circuit breakers?
One question arises, how do you handle OPEN circuit breakers? Luckily, resilience4j offers a fallback configuration with Decorators utility. In most cases, you can always configure this to get the result from previous successful results so that users can still work with the application.
Conclusion
In this post, I have covered how to use a circuit breaker in a Spring Boot application. The code for this demo is available here.
In this demo, I have not covered how to monitor these circuit breaker events as resilience4j the library allows storing these events with metrics that one can monitor with a monitoring system.
If you enjoyed this post, consider subscribing to my blog here.
References
- Resilience4J Library – Resilience4J
- Circuit Breaker with Resilience4j – Circuit Breaker