Tag Archives: Spring-boot

Session Management with Spring-Session and JDBC

User session management is vital to keep user state in an application. The session helps to keep track of where the user is currently and if he comes back to check the application, it can be retrieved in a similar state. In this post, I will show how to use the Spring session with the database to maintain session data.

Spring Session

Spring session offers APIs to manage user sessions. This gives the flexibility to build an enterprise-level application using Spring Boot and still segregating with Spring Session. Another advantage of using Spring session is that it offers different storage options. You can store the session data in redis, database using JDBC or in-memory. Since we are able to store the session data in database, session data is not lost if application shuts down or crashes. This helps to manage user session iteratively.

In this post, I will show how I have used Spring session in my application Renters Feedback.

Create a Spring Boot based application

I will not be showing how to create a spring boot based application. The assumption is you know the basics of Spring Boot. Once you create a maven-based or Gradle-based Spring boot application, you can include a dependency for Spring session.

org.springframework.session:spring-session-jdbc:2.1.6.RELEASE

Configure Storage Type

With the Spring session, you have multiple options to configure the storage type. For this post, I will be showing how to use a database with JDBC to store user session data. With setting application.properties you can create required session tables on the fly OR you can create them before starting your application, so you don’t have to create them always.

From a production system perspective, I prefer to create tables while setting up an application once and never worry about it.

So before we can use the spring session, create the required database tables in your choice of database. In this post, I will be using mysql for database.

Create the following two database tables in your application database

create table SPRING_SESSION (
primary_id CHAR(36) NOT NULL,
session_id CHAR(36) NOT NULL,
creation_time BIGINT NOT NULL,
last_access_time BIGINT NOT NULL,
max_inactive_interval INT NOT NULL,
expiry_time BIGINT NOT NULL,
principal_name VARCHAR(100),
CONSTRAINT spring_session_pk PRIMARY KEY (primary_id)
);

create table SPRING_SESSION_ATTRIBUTES (
session_primary_id CHAR(36) NOT NULL,
attribute_name VARCHAR(200) NOT NULL,
attribute_bytes BLOB NOT NULL,
CONSTRAINT spring_session_attributes_pk PRIMARY KEY (session_primary_id, attribute_name),
CONSTRAINT spring_session_attributes_fk FOREIGN KEY (session_primary_id) REFERENCES SPRING_SESSION(primary_id) ON DELETE CASCADE
);


Configuring your application.properties  as follows:

spring.datasource.url=jdbc:mysql://127.0.0.1/sampledb?autoReconnect=true&useSSL=true
spring.datasource.username = sa
spring.datasource.password=*********
spring.datasource.driver-class-name=com.mysql.jdbc.Driver
spring.session.store-type=jdbc
spring.session.jdbc.initialize-schema=never
spring.session.jdbc.table-name=spring_session

One reason we specified spring.session.jdbc.initialize-schema=never is because we are manually creating the database tables.

Now to use Spring session in our application, we will configure Spring security and enable @EnableWebSecurity . Basically this will allow us to have a form-based authentication and on authentication, we can have a valid session created and stored in the database for logged in user.

I will not be showing how to enable Spring Security, you can read my old post about Using Spring Security in Spring Boot application.

Configuring JDBC HTTP Session

One key thing to do as part of this implementation is to enable Spring Session in the application by using annotation @EnableJdbcHttpSession as shown below:

@SpringBootApplication
@EnableJdbcHttpSession
public class HomeApplication extends SpringBootServletInitializer
{
	public static void main(String[] args)
	{
		SpringApplication.run(HomeApplication.class, args);
	}

}

As per Spring documentation here Spring Session, the annotation @EnableJdbcHttpSesion adds a bean with the name of springSessionRepositoryFilter . This filter handles replacing HTTP session implementation with Spring Session.

Running the application

Now to see the entire application, we can see the following recording to see how spring boot based application creates the session and stores in the database.

In conclusion, we showed how to implement session management using the Spring Session.

References

  1. Spring Session – Spring Session
  2. Spring Session with JDBC – Spring Session with JDBC
 

Forgot Password Feature in Spring Boot Application

In this post, we will show how to implement a forgot password feature for your Spring Boot Application. In my old post, I had shown how to create social login for an application.

Most web applications will have forgot password page and there are different policies about password creation and resetting the password. Overall, you can assume that user will forget a password and will need to reset password.

Flow for Forgot Password

  1. User visits login screen and clicks on forgot password option.
  2. User enters email address in forgot password box.
  3. On Server side, we verify if a user with that email exists or not.
  4. On Server side, we create a time-bound security reset token affiliated with that user and send it in an email, provided that the user exists.
  5. User receives an email to reset password.
  6. Once the user clicks the reset password link which includes the reset token.
  7. User redirects to a page where the user can reset the password.
  8. Then the user submits a new password along with reset token. Based on reset token, we first verify if the user is correct and then saves the new password.
  9. User redirects to login page.

Once now, we have described the flow, we can show how to implement this feature.

Forgot Password UI

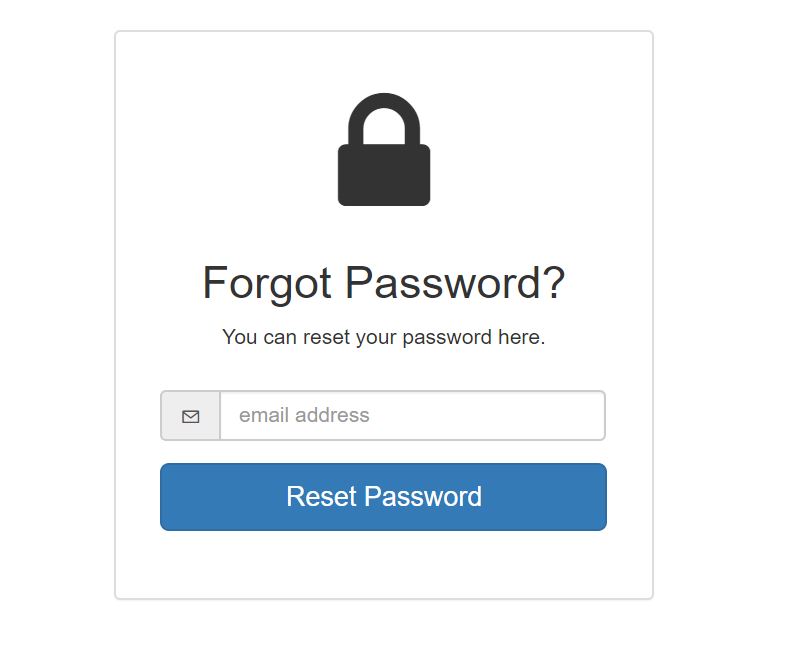
A screen where user will enter email address to reset the password, will look like below:

Feature of Forgot Password

Forgot Password

Once the user enters his email address, server side implementation will validate if a user with that email exists or not. In LoginController , this posting of Reset Password will look like below:


        String email = ServletUtil.getAttribute(request, "email");
        User user = userRepository.findUserByEmail(email);

        if(user == null)
        {
            model.addAttribute("error", "We didn't find this user");
            return "forgotpassword";
        }
        PasswordResetToken token = new PasswordResetToken();
        token.setToken(UUID.randomUUID().toString());
        token.setUser(user);
        token.setExpiryDate(30);
        passwordResetTokenRepository.save(token);
        
        Mail mail = new Mail();
        Map<String, Object> modelObj = new HashMap<>();
        modelObj.put("token",token);
        modelObj.put("user", user);
        String url =
                request.getScheme() + "://" + request.getServerName() + ":" + request.getServerPort();
        modelObj.put("resetUrl", url + "/resetpassword?token=" + token.getToken());
        mail.setModel(modelObj);
        emailService.sendEmail(mail);

As you see in this code token object is one-to-one mapped with user.  Once the user submits email address, we send him a password reset email with URL.

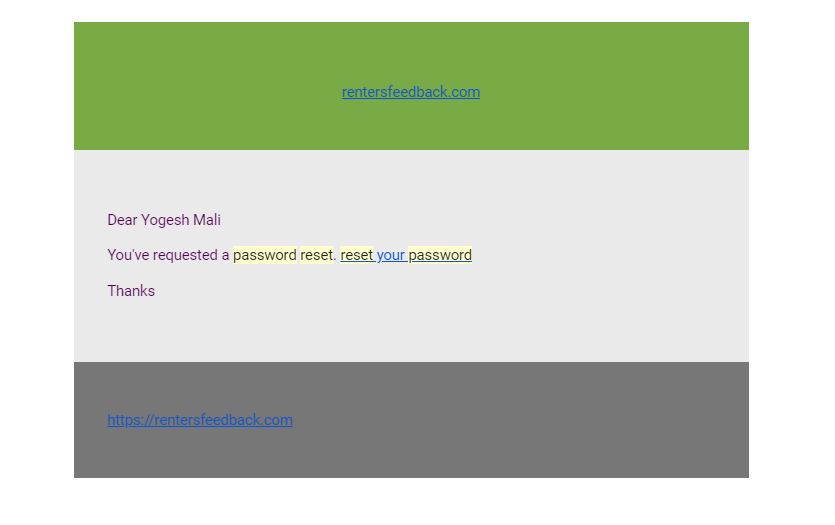
So this email will look like below:

Password Reset Email

Once the user clicks on the link from email, user will be redirected to a form to submit new password. When displaying the form, first the reset token will be validated if it has not expired and exists. GET request for reset form will present the form.

POST request will submit the form to reset user password.


    @GetMapping
    public String getPasswordResetPage(@RequestParam(required=false) String token, Model model)
    {
        PasswordResetToken passwordResetToken = passwordResetTokenRepository.findByToken(token);
        if(passwordResetToken == null)
        {
            model.addAttribute("error","Could not find reset token");
        }
        else if(passwordResetToken.isExpired())
        {
            model.addAttribute("error","Reset Token is expired");
        }
        else
        {
            model.addAttribute("token",passwordResetToken.getToken());
        }
        return "resetpassword";
    }

    @PostMapping
    public String handlePasswordReset(HttpServletRequest request, Model model)
    {
        String token = ServletUtil.getAttribute(request, "token");
        PasswordResetToken passwordResetToken = passwordResetTokenRepository.findByToken(token);
        User user = passwordResetToken.getUser();
        String password = ServletUtil.getAttribute(request, "password");
        String confirmPassword = ServletUtil.getAttribute(request, "confirmPassword");
        
        user.setPassword(updatedPassword);
        user.setPasswordConfirm(updatedPassword);
        userRepository.save(user);
        passwordResetTokenRepository.delete(passwordResetToken);

        return "redirect:/login?resetSuccess";

    }

After new password is saved, the reset token is deleted, so it can’t be reused.

Conclusion

In this post, we showed how to implement the user story of forgot password. There are usually different possibilities to reset the password. It mostly depends on what password policies you adapt.

References

  1. Forgot Password Feature – Forgot Password


How to add Stripe Payment to Spring Boot Application

In this post, we will show how to add Stripe Payment to Spring boot application. Most enterprise applications offer a way where customer can pay online. Online payments are the backbone of internet world in current times. If you ever built an application for a customer, previously there were physical cheques OR credit card payments. With the applications becoming more web based, it has become utmost necessary to integrate your application with some kind of payment gateway. Payment gateway will handle all tax and financial regulation related complications which the application doesn’t have to deal with.

The functionality is part of the application Social KPI that I am building.

What are we trying to achieve here?

Story for Stripe Payment

An administrator comes on the billing page and pays the bill for that month. Once the bill is paid, the billing page will show that the bill has been paid for that month. So the option to enter credit card details will only be shown if the bill has not been paid.

As part of payment service, we will be using Stripe . Once the user enters credit card details and she can enter Pay Now button which will contact Stripe API to get token, this token will be used to create a charge on Stripe and Stripe will respond with success or failure of the charge.

Flow

To summarize the flow

  1. User clicks Pay Now to pay the charges
  2. Frontend Stripe javascript API contacts Stripe to create token using enter billing details
  3. Frontend Stripe javascript API sends this token to server to handle billing on server side
  4. On server side, controller uses the token and amount to create charge for that customer for application usage.
  5. For paid bills, the status is marked as paid for the customer for that month.

Frontend Implementation

To use Stripe APIs, we must first create account on stripe.com as a developer and get the keys. Good thing is Stripe offers API keys for test and live environments. For this post and demo, we will be using test keys only. Once we have API keys, we will use them in our frontend and backend implementation.

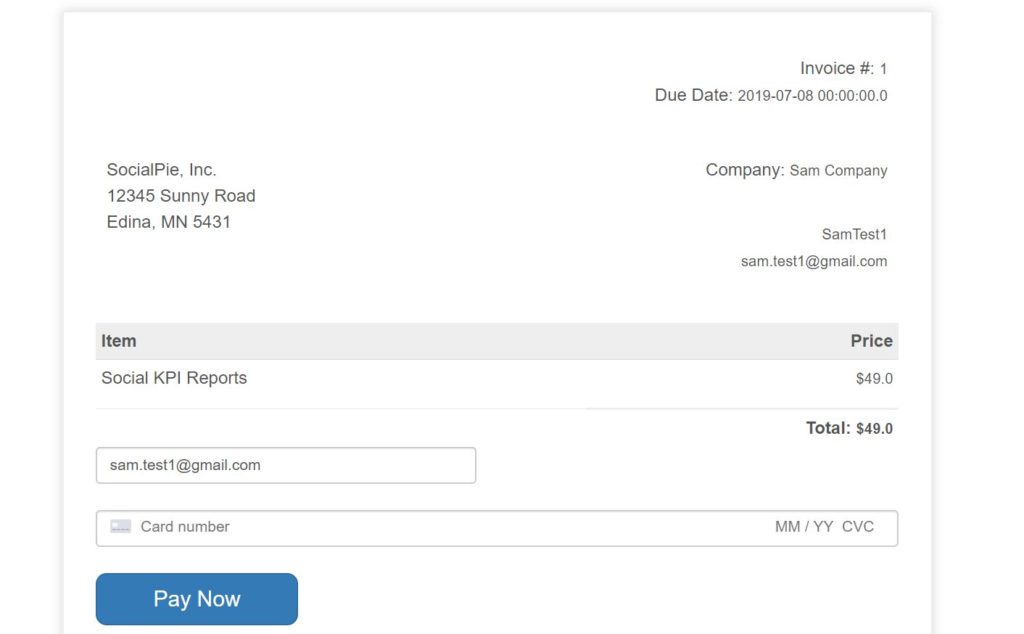
In following screenshot, you will see how the billing page will look:

Billing Page

Once the user clicks on Pay Now, the javascript function from Stripe for mounting card and creating token will be called. Once the token is available, the same function will pass it server by submitting a POST request. Sample of this code will look like below:


            var form = document.getElementById('payment-form');
            form.addEventListener('submit',function(event){
                event.preventDefault();
                payTheBill();
            });

            function payTheBill(){
                stripe.createToken(card).then(function(result){
                    if(result.error){
                        var errorElement = document.getElementById('card-errors');
                        errorElement.textContent = result.error.message;
                    } else {
                        var token = result.token.id;
                        var email = $('#email').val();
                        var companyid = $('#companyid').val();
                        var amount = $('#amount').val();
                        $.get(
                            "/createcharge",
                            {email:email,token:token,companyid : companyid, amount:amount},
                            function(data){
                                alert(data.details);
                            },'json');
                    }
                })
            }

Backend Implementation

As part of the application Social KPI, I have a database table billing to track customer’s paid bills. The PaymentController is a REST controller which will have a POST request mapping for creating a charge and storing in the database table and mark the bill as paid. As shown above in javascript code, once the token is available it will be sent to server side to controller to handle the charge. This will be a REST call, so the controller is also RestController.


 @RequestMapping(value="/createcharge",method = RequestMethod.GET)
    @ResponseBody
    public Response createCharge(String email, String token, String companyid, double amount)
    {
        LOGGER.info("Enter >> createCharge() ");

        if(token == null)
        {
            throw new RuntimeException("Can't create a charge, try again");
        }

        Billing billing = billingRepository.findByCompanyId(Integer.parseInt(companyid));

        double billedAmount = amount * 100;

        String chargeId = paymentService.createCharge(email,token,billedAmount);

        if(chargeId != null && !chargeId.equals(""))
        {
            LOGGER.info("bill has been charged on consumer's account");
            billing.setStatus(true);
            billing.setPaiddate(new Date());
            billingRepository.save(billing);
        }

        LOGGER.info("Exit << createCharge() ");
        return new Response(true,"Congratulations, your card has been charged, chargeId= "+chargeId);
    }

As shown above, Service called paymentService will create a charge on Stripe. To implement paymentService, you will need to include stripe java library in your implementation.

compile('com.stripe:stripe-java:10.5.0')

So the service class PaymentService will look like below to create charge:


    public String createCharge(String email, String token, double amount)
    {
        String id = null;
        try
        {
            Stripe.apiKey = API_SECRET_KEY;
            Map chargeParams = new HashMap<>();
            chargeParams.put("amount", (int)(amount*100));
            chargeParams.put("currency", "USD");
            chargeParams.put("description", "Charge for " + email);
            chargeParams.put("source", token);
            Charge charge = Charge.create(chargeParams);
            id = charge.getId();
        }
        catch(StripeException e)
        {
            throw new RuntimeException("Unable to process the charge", e);
        }
        return id;
    }

Once the bill is paid, administrator will see this as the bill paid for that month.

Conclusion

In this post, we showed how to integrate Spring boot application with Stripe payment gateway.

References

  1. Stripe API reference - https://stripe.com/docs/api/charges
  2. Integrate Stripe with Spring boot - Stripe with Spring boot

How to file upload using Spring Boot

In this post, I will show how I added file upload functionality in my Spring Boot application, social KPI.

On the outskirts, it looks very simple functionality and it is indeed simple with Spring Boot. As part of this post, we will build a web form where an administrator will add additional users for his/her company by importing a CSV file in a particular format.

Basic functionality is to provide a way for an administrator to import a CSV file, read and validate the data, and save it in the database if proper data.

Now once we have defined our user story, let’s get started with the post.

Form For File Upload In a Spring Boot Application

We are using thymeleaf templates for our spring boot based application. So writing a simple html page with a form to upload a file is very straight forward as below:

<div class="container importuser">
    <div class="form-group">
    <form method="POST" th:action="@{/uploadUsers}" enctype="multipart/form-data">
        <input type="hidden" name="companyGuid" th:value="${companyGuid}"/>
        <input type="file" name="file"/></br></br>
        <button type="submit" class="btn btn-primary btn-lg" value="Import">Import
        </button>
    </form>
    </div>
</div>

As you see in this form, clicking on Import button will kick the action to upload users.

Controller to handle file upload on backend side

A controller to handle upload users functionality will look like below:

    @RequestMapping(value = "/uploadUsers",method= RequestMethod.POST)
    public String fileUpload (@RequestParam("file") MultipartFile file, @RequestParam(
            "companyGuid") String companyGuid,
                              RedirectAttributes redirectAttributes)
    {
        LOGGER.info("File is {}", file.getName());
        LOGGER.info("Company Guid is {}", companyGuid);

        if (file.isEmpty())
        {
            redirectAttributes.addFlashAttribute("message", "Please select a file to upload");
            return "redirect:/uploadStatus";
        }

        List userList = FileUtil.readAndValidateFile(file, roleRepository);
        for(User user: userList)
        {
            User createdUser = userManager.createUser(companyGuid, user);
        }

        redirectAttributes.addFlashAttribute("message",
                "You successfully uploaded " + file.getOriginalFilename() + " and added " + userList.size() + " users");


        return "redirect:/uploadStatus";
    }

The method to readAndValidateFile is simply reading the data from file, validating to make sure all the fields in CSV file exists, if wrong format, it will throw an error. If a valid file, it will create a list of users. UserManager will create each user.

The class FileUtil is as below:

package com.betterjavacode.socialpie.utils;

import com.betterjavacode.socialpie.models.Role;
import com.betterjavacode.socialpie.models.User;

import com.betterjavacode.socialpie.repositories.RoleRepository;
import org.springframework.beans.factory.annotation.Autowired;
import org.springframework.web.multipart.MultipartFile;

import java.io.BufferedReader;
import java.io.IOException;
import java.io.InputStream;
import java.io.InputStreamReader;
import java.util.ArrayList;
import java.util.List;

public class FileUtil
{
    private static final String FIRST_NAME = "firstname";
    private static final String LAST_NAME = "lastname";


    public static List readAndValidateFile (MultipartFile file, RoleRepository roleRepository)
    {
        BufferedReader bufferedReader;
        List result = new ArrayList<>();
        try
        {
            String line;
            InputStream inputStream = file.getInputStream();
            bufferedReader = new BufferedReader(new InputStreamReader(inputStream));
            while((line = bufferedReader.readLine()) != null)
            {
                String[] userData = line.split(",");
                if(userData == null || userData.length != 5)
                {
                    throw new RuntimeException("File data not in correct format");
                }
                if(FIRST_NAME.equalsIgnoreCase(userData[0]) && LAST_NAME.equalsIgnoreCase(userData[2]))
                {
                    continue; // first line is header
                }
                User user = new User();
                user.setFirstName(userData[0]);
                user.setMiddleName(userData[1]);
                user.setLastName(userData[2]);
                user.setEmail(userData[3]);
                Role role = roleRepository.findByRoleName(userData[4]);
                user.setRole(role);
                result.add(user);
            }
        }
        catch(IOException e)
        {
            throw new RuntimeException("Unable to open the file " + e.getMessage());
        }
        return result;
    }
}

A working demo

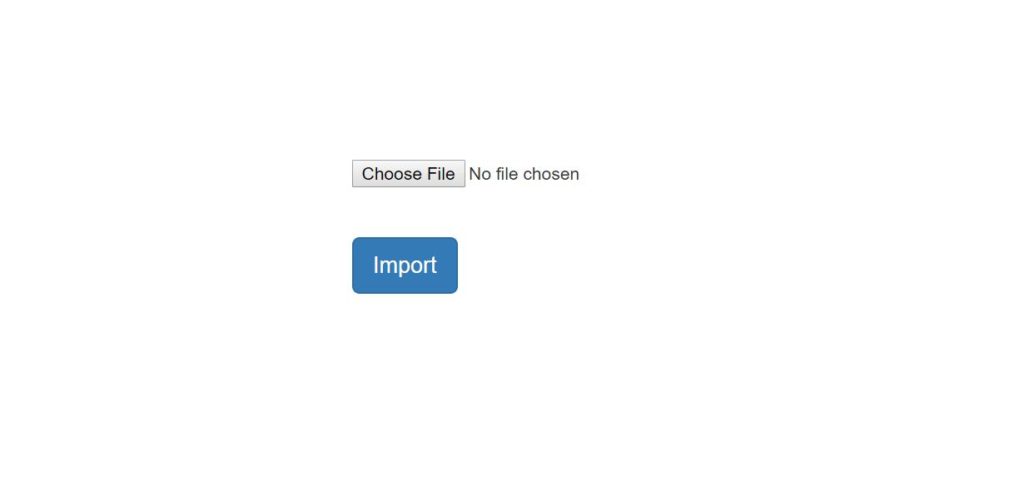
Once I log into the application Social KPI, I click on Add Users and it will take me to upload the users screen which will look below:

Spring Boot File Upload

Import Users

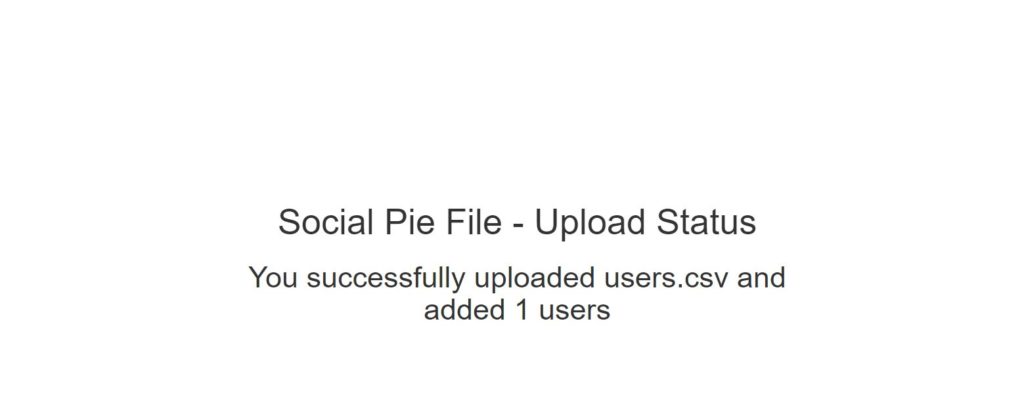
Once you choose a file in CSV format to upload and click on Import, it will show the screen as below:

Spring Boot File Upload - Upload Status

File Upload Status

Conclusion

So in this post, we showed how to import a file while using Spring Boot multipart form.

References

  1. Uploading files – uploading files

Metrics collection with Micrometer and Prometheus

In my previous post here, I showed how to configure Micrometer and Prometheus to collect microservice performance metrics data. In this post, I will show how we can collect Spring Boot Actuator metrics data and transfer to Prometheus UI, and view it using dashboards.

Spring Boot offers a lot of great features with Actuator. With enterprise applications constantly looking for ways to monitor the application, these metrics become even more important.

Configure Prometheus using the docker

Firstly, we will configure the Prometheus. Depending on the environment you are using, start the docker terminal. Use the following command to download Prometheus

docker pull prom/prometheus

We will configure Prometheus to scrape metrics from our application’s actuator endpoint. As shown in the previous post here, spring boot actuator endpoint is running on http://localhost:8080/actuator/prometheus

We will add Prometheus configuration in prometheus.yml file as below:

# my global config
global:
  scrape_interval:     5s # Set the scrape interval to every 5 seconds. Default is every 1 minute.
  evaluation_interval: 5s # Evaluate rules every 5 seconds. The default is every 1 minute.
  # scrape_timeout is set to the global default (10s).
 
# Alertmanager configuration
alerting:
  alertmanagers:
  - static_configs:
    - targets:
      # - alertmanager:9093
 
# Load rules once and periodically evaluate them according to the global 'evaluation_interval'.
rule_files:
  # - "first_rules.yml"
  # - "second_rules.yml"
 
# A scrape configuration containing exactly one endpoint to scrape:
# Here it's Prometheus itself.
scrape_configs:
  # The job name is added as a label `job=<job_name>` to any timeseries scraped from this config.
  - job_name: 'prometheus'
 
    # metrics_path defaults to '/metrics'
    # scheme defaults to 'http'.
 
    static_configs:
    - targets: ['localhost:9090']
 
  - job_name: 'spring-actuator'
    metrics_path: '/actuator/prometheus'
    scrape_interval: 5s
    static_configs:
    - targets: ['IPADDRESS_OF_HOST:8080']

Few things to notice from this configuration file. scrape_interval is 5s. In scrape_configs , job name for our Spring Actuator endpoint is spring-actuator and the endpoint is running at /actuator/prometheus. The targets section shows where our application is running.  Save this file at a location that we can use to mount while running the docker container.

To Run the Prometheus using docker, use the following command:

docker run --name prometheus -d --mount type=bind,source=//c/Users/sandbox/prometheus.yml,destination=/etc/prometheus/prometheus.yml -p 9090:9090 prom/prometheus

This will start the Prometheus server at 9090 and it can be accessed at 9090.  Meanwhile, we can check the Prometheus dashboard. Let’s get the docker IP first by using the following command

docker-machine ip

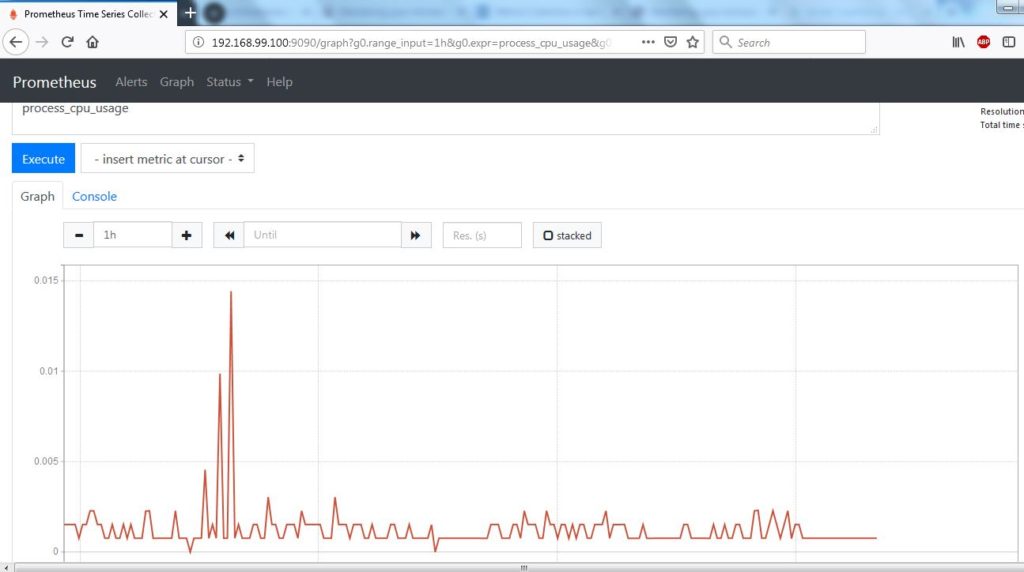
Now check the Prometheus dashboard at http://docker-ip:9090 , it will look like below:

Spring Boot Actuator Metrics in Prometheus Dashboard

Conclusion

In this post, we showed how to run a Prometheus out of docker container and scrape metrics from Spring boot application.

References

  1. Spring Boot and Prometheus – Spring boot actuator and Prometheus
  2. Monitoring your microservices – Monitoring your microservices