Any enterprise application has to perform well under load. So performance of such application can be tracked. There are tools that help to track this performance. Apache JMeter is one such tool. In this post, we will use Apache JMeter to do a load test on a sample application and see how we can measure the performance.
Depending on your application, you can track different functionality for load tests. Database heavy operations would be the most affected by this tracking. That’s where load tests can help us to point out flaws in our design and code and how we can improve. One major difference to note is that load tests are different from stress tests. In stress tests, we try to measure how much load the application can tolerate before it breaks. In load tests, we are measuring the performance from a time perspective.
What you will need
- Apache JMeter
- A running web application
- Browser of your choice
Load Test Process
Start Apache JMeter and record the test script. Let’s create a test plan that we will execute for our load test. As part of this post, I will be load testing login to a Spring boot based web application that I am running at https://localhost:8443/home
Create a test plan
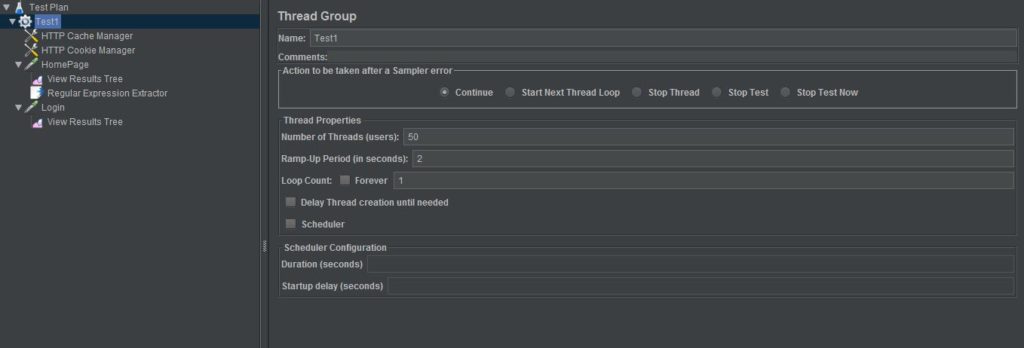
Once you launch JMeter, on left hand side window you will see an option for test plan. Create a test plan and let’s name it Test1 as shown below:

Test Plan for JMeter Script
Once you create the test plan, select how many threads (number of users) you want to run for this test, what’s the ramp-up period for one thread and what’s the loop count. For this post, I have selected 50 threads with each thread ramping up in 2 seconds with a single loop.
Add Config Elements
Right click on test plan and add config elements for HTTP Cache Manager and HTTP Cookie Manager. This is required for handling CSRF tokens in our request that we will need later.
Add a Sampler
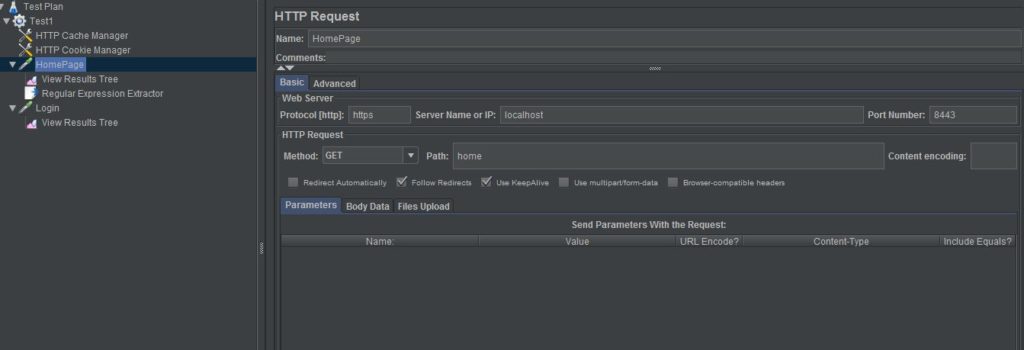
Now to test our web application, we will add a sampler with HTTP Request. We will name this HomePage. This is displayed as below:

Http Request Sampler
We will have to provide protocol, server name, port number and path as shown above.
Add a Listener
Now we will add a listener to our sampler to view results as a tree.
Add a Post Processor
We will need _csrf token from our home page so we can pass this token in POST request to login page of web application.
This Post Processor will have a regular expression extractor which will extract _csrf token from home page and will pass to next HTTP Request Sampler for Login Page.

Regular Expression Extractor
Add another Sampler for Login Page
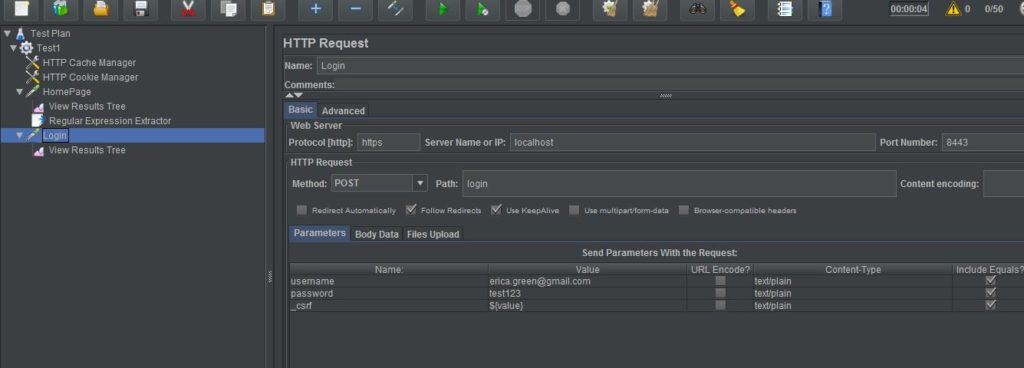
Now we will add Sampler for Login Page which will be a POST request to login endpoint of our web application. We will also pass username and password along with _csrf token whose value will be populated from extractor.

Login Page
Run the test script for load test
Now if we run our script in JMeter, it will run 50 threads at the same time to test login for application. Depending on performance, it might take a long time, but considering this a simple application, JMeter will run this test within few seconds.
Review the results
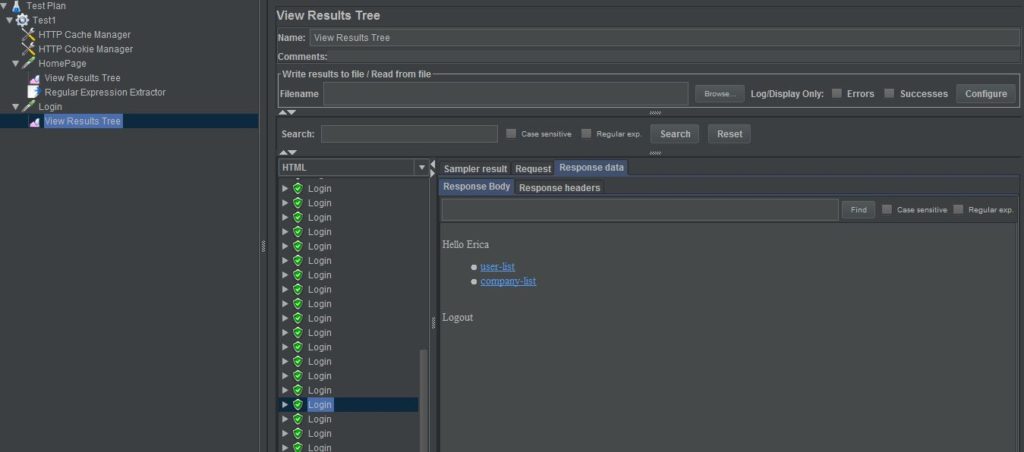
Once the test is complete, you can check the View Results Tree and it will show you the results of our each individual test thread. In Response Data tab, you can view if our test was successful or not. It should show the result of our page in html format.

Results
Conclusion
In this post, we used Apache JMeter for load testing and how it can help us to design our application from performance perspective.