In this post, I will show how to use Keycloak as an identity broker. If you want to learn more, you can follow the guide on how to use keycloak with spring boot application.
What you will need
- Keycloak
- Postgres Database
- Service Provider Application (We are using a spring boot application)
- Identity Provider
What is Identity Broker?
An identity broker is a service that integrates two other services. An identity broker usually acts as an intermediary between a service provider and another identity provider. The identity broker creates a relationship with a third-party identity provider to use the provider’s identities to access the service provider application.
In this post, we will show how you can configure Keycloak as an identity broker between a spring boot application and an identity provider.
Start Keycloak with Postgres Database
If you download and run Keycloak as a standalone service, it will H2 (In-Memory) database. But we plan to use the Postgres database. This will also give a lot of clarity on how to use Keycloak with a relational database in an actual production environment.
- Install Postgres (I am using version 13.11)
- Download Postgres JDBC driver
- Create a database called
keycloakin Postgres once you set up the database server locally.
To make Keycloak to use the Postgres database, we will need to update some configuration in the Keycloak installation directory. For this demo, I am using Keycloak version 11.0.1. If you are using the latest version, I will share the information below on how to integrate that with the Postgres database.
-
- Go to
Keycloak_installation/standalone/configurationdirectory - Open
standalone.xmlfile in a XML editor - Add the below XML tags in
datasources
- Go to
<datasource jndi-name="java:jboss/datasources/KeycloakDS" pool-name="KeycloakDS" enabled="true" use-java-context="true"
				statistics-enabled="${wildfly.datasources.statistics-enabled:${wildfly.statistics-enabled:false}}" >
	<connection-url>jdbc:postgresql://localhost:5432/keycloak </connection-url>
	<driver> postgres </driver>
	<security>
		<user-name>username </user-name>
		<password>password </password>
	</security>
</datasource>
<drivers>
	<driver name="postgres" module="com.postgres">
	<driver-class>org.postgresql.Driver </driver-class>
        <xa-datasource-class>org.postgresql.xa.PGXADataSource </xa-datasource-class>
	</driver>
</drivers>-
- We also need to update bindings in subsystem tags in the same
standalone.xmlfile as below
- We also need to update bindings in subsystem tags in the same
<default-bindings context-service="java:jboss/ee/concurrency/context/default" datasource="java:jboss/datasources/KeycloakDS"
managed-executor-service="java:jboss/ee/concurrency/executor/default"
managed-scheduled-executor-service="java:jboss/ee/concurrency/scheduler/default"
managed-thread-factory="java:jboss/ee/concurrency/factory/default"/>
If you are using the latest version of Keycloak, all you have to do is
-
- Edit the file
conf/keycloak.confand set the following properties
- Edit the file
db=postgresql
db-username=username
db-password=password
db-url=jdbc:postgresql://localhost:5432/keycloak
Once you set the above configuration, now we can start the Keycloak. If you are using the older version like me, you can use the following command:
standalone.bat -Djboss.socket.binding.port-offset=100
OR if you are using the latest version of Keycloak, you can use
kc.bat start-dev
Both of these commands are from a Windows environment perspective. Once the Keycloak server starts, access the Keycloak administration UI in the browser http://localhost:8180
Configure Keycloak with a realm
Let’s create a realm in Keycloak once you login as an administrator.
Once we create a realm, we don’t need to do anything yet. We will use Realm to set up our service provider later.
In the next step, we will configure another identity provider.
Configure Identity Provider in Keycloak
You can use Keycloak as an identity provider for SSO. But in this demo, Keycloak is acting as an identity broker. We will use saml-idp as an identity provider. This is a simple node-based SAML identity provider for development purposes. You can read about it more here.
npm install -g saml-idp.
Use the below command to start this identity provider. It will run on port 7000 by default.
saml-idp --acsUrl {POST URL} --audience {audience}
Now if we access http://localhost:7000 , the identity provider will be running and we can see the metadata in the browser. We can download this metadata to configure in Keycloak.
Let’s create an identity provider (SAML Version 2.0).
Enter an alias and Redirect URI
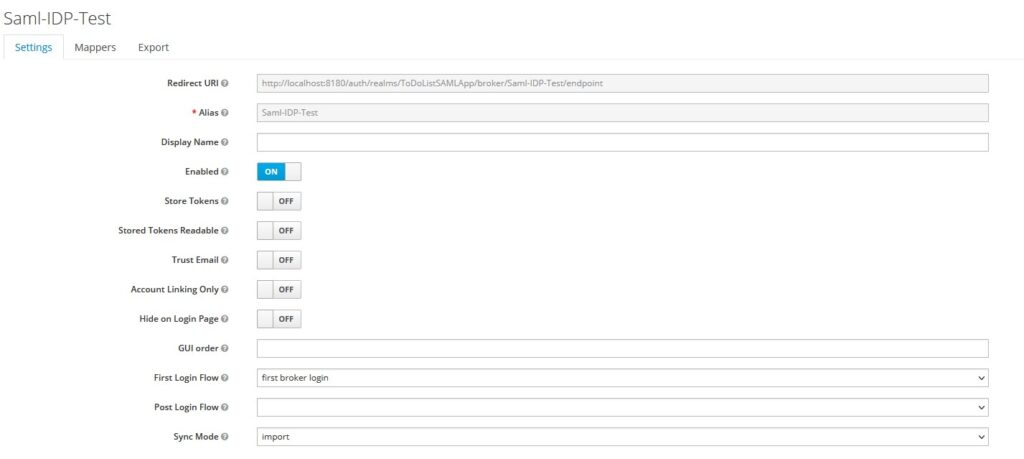
Let’s configure the SAML Identity provider’s details in Keycloak.
SSO URL – http://localhost:7000/saml/sso
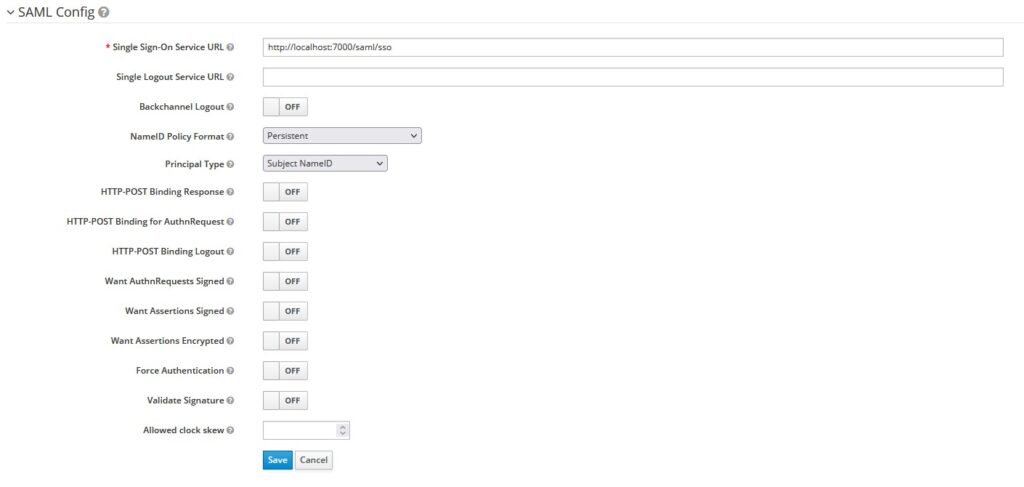
Save the configuration. Now you should be able to download Keycloak’s metadata that you can import into the identity provider (saml-idp).
ACS URL = http://localhost:8180/auth/realms/ToDoListSAMLApp/broker/Saml-IDP-Test/endpoint
Audience = http://localhost:8180/auth/realms/ToDoListSAMLApp
Now, we can run our identity provider with the right ACS URL and Audience.
saml-idp --acsUrl http://localhost:8180/auth/realms/ToDoListSAMLApp/broker/Saml-IDP-Test/endpoint --audience http://localhost:8180/auth/realms/ToDoListSAMLApp
Next, we configure the service provider application.
Configure Service Provider in Keycloak
We already have written a spring boot application that we will use as a service provider. If you want to learn more about the Spring Boot application, you can follow this previous post.
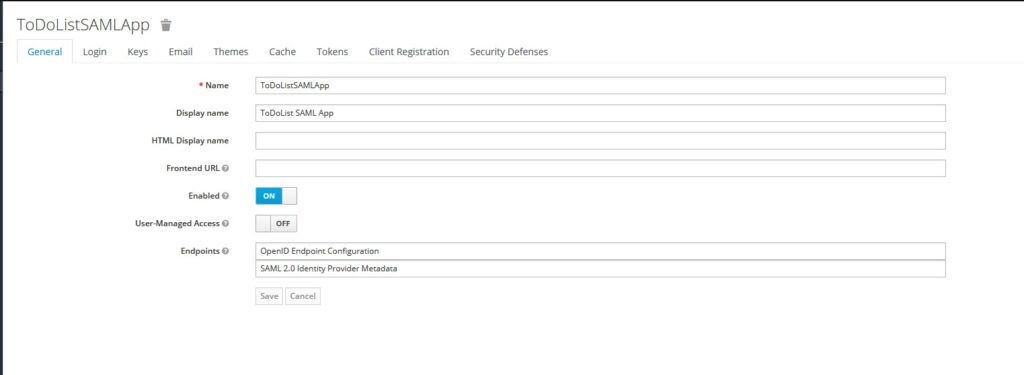
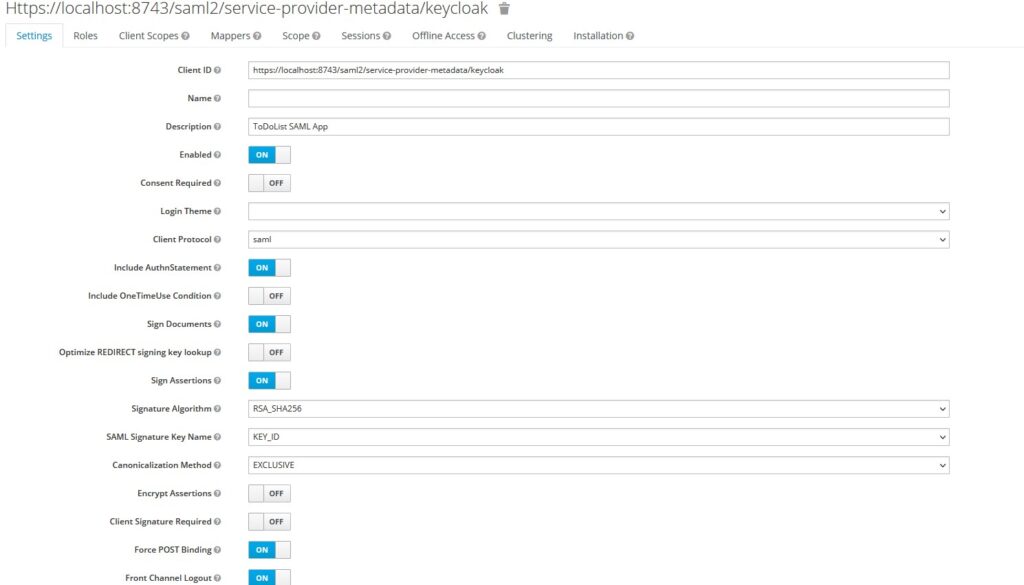
- Create a new client under our realm in Keycloak
- Provide a client id as
https://localhost:8743/saml2/service-provider-metadata/keycloak - Enter Name and Description for the client
- Select
SAMLas a protocol underClient Protocol - Enable
include authnstatements,sign documents, andsign assertions - Select
RSA_SHA256as Signature Algorithm usernameas Name ID Format- Root URL –
https://localhost:8743 - Valid Redirect URLs –
https://localhost:8743/* - Master SAML Processing URL –
https://localhost:8743/saml2/service-provider-metadata/keycloak - ACS POST/REDIRECT Binding URL –
https://localhost:8743/login/saml2/sso/keycloak
And that’s all for Keycloak configuration is concerned.
Since we are using Spring Boot Application, we have configured the following properties in application.properties
# ====================================================================================
## Keycloak and SAML SP Properties
# ====================================================================================
spring:
    security:
        saml2:
            relyingparty:
                registration:
                    keycloak:
                        identityprovider:
                            entity-id: http://localhost:8180/auth/realms/ToDoListSAMLApp
                            singlesignon:
                                sign-request: false
                                url: http://localhost:8180/auth/realms/ToDoListSAMLApp/protocol/saml
                            verification:
                                credentials:
                                - certificate-location: classpath:credentials/idppostgres.cert
Start the spring boot application once you configure the properties.
Demo of Keycloak as Identity Broker
Assuming we are running Spring Boot Application, Keycloak, and another identity provider (saml-idp), now we can run the demo by accessing the Spring Boot Application.
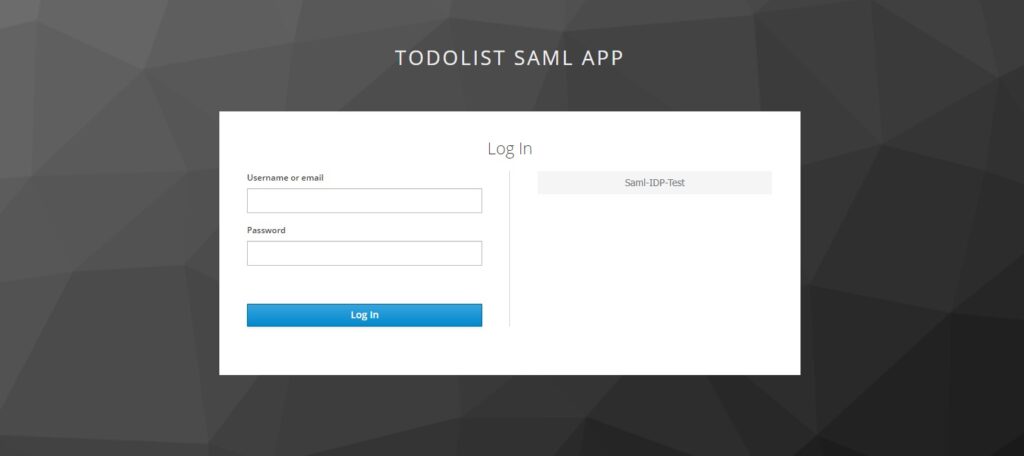
You can select the identity provider Saml-IDP-Test and it will redirect to that identity provider.
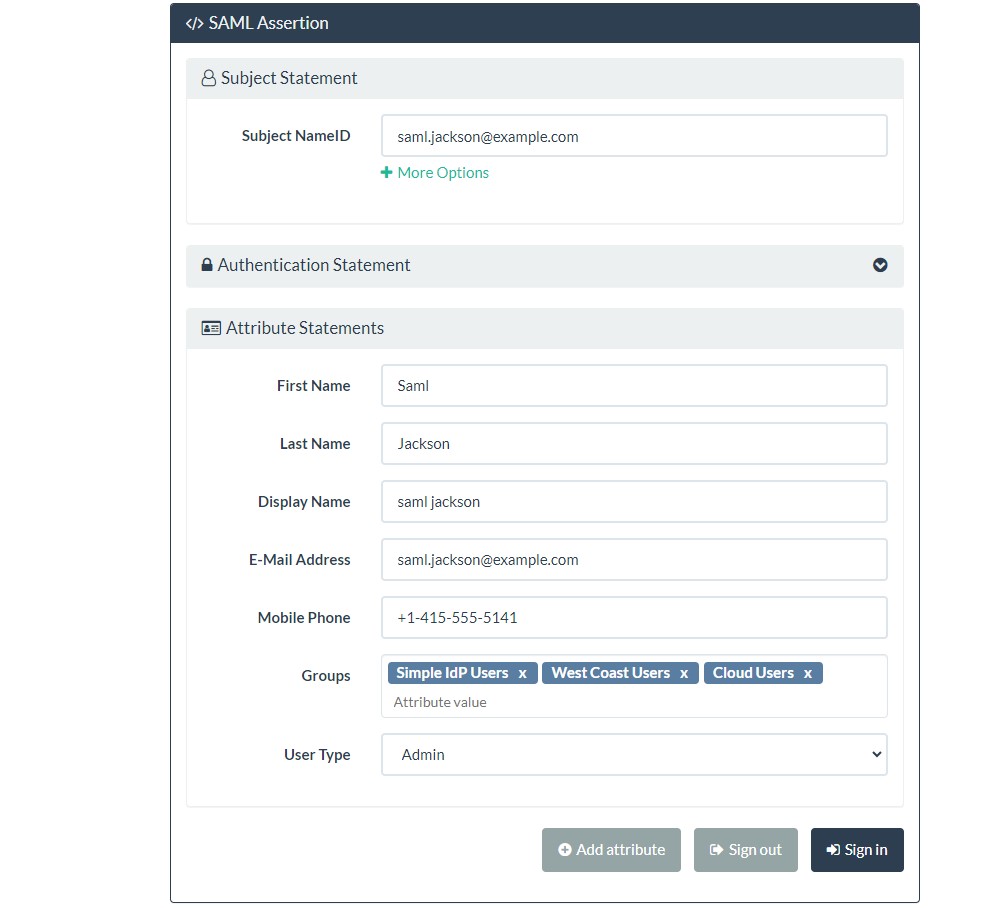
Once you select Sign In option, it will redirect you back to service provider application if the user already exists in Keycloak. If the user does not exist in Keycloak, keycloak will ask to enter minimal attributes and it will create that user dynamically (JIT Provisioning).
 And this way, the user was able to log in successfully.
Conclusion
In this post, I showed how to use Keycloak as an identity broker with another identity provider. Keycloak is a very well-documented SSO provider. If you have any questions or feedback, please do send me questions.