In this post, I show how we can connect Spring Boot Application with AWS Dynamo DB. I will also cover some fundamentals of AWS Dynamo DB which is a No-SQL database.
AWS Dynamo DB
As per Amazon Documentation, Dynamo DB is No-SQL key-value and document database. We do have some alternatives like Cassandra (key-value) or Mongo DB (document).
Dynamo DB offers
- reliable scaleable performance
- a simple API for allowing key-value access
Dynamo DB is usually a great fit for application with the following requirements:
- A large amount of data and latency requirements
- Data sets for recommendation systems
- Serverless Application with AWS Lambda
Key Concepts
Before we can use Dynamo DB, it is important to understand some key concepts about this database.
- Tables, Items, and Attributes – These three are the fundamental blocks of Dynamo DB. A table is a grouping of data records. An item is a single data record in a table. Henceforth, each item in a table is identified using the primary key. Attributes are pieces of data in a single item.
- Dynamo DB tables are schemaless. However, we only need to define a primary key when creating the table. A simple primary key or a composite primary key are two types of primary keys.
- Secondary Indexes – Sometimes primary keys are not enough to access data from the table. Secondary indexes enable additional access patterns from the Dynamo DB. Nevertheless, there are two types of indexes – local secondary indexes and global secondary indexes. A local secondary index uses the same partition key as the underlying table, but a different sort key. A global secondary index uses the different partition key and sort key from the underlying table.
Applications with Dynamo DB
There is one difference with Dynamo DB compared to other SQL or NoSQL databases. We can interact with Dynamo DB through REST calls. We do not need JDBC Connection protocols where applications need to maintain consistent connections.
There are two ways we can connect applications to Dynamo DB.
- Use Spring Data Library with Dynamo DB
- Use an AWS SDK provided client
Spring Boot Application
As part of this demo, we will create some data model classes that depict entity relationships. Subsequently, the application will provide a simple REST API for crud operation and the application will store the data in Dynamo DB.
So let’s start with adding the required dependencies in our application:
dependencies {
	implementation 'org.springframework.boot:spring-boot-starter-web'
	implementation 'io.github.boostchicken:spring-data-dynamodb:5.2.5'
	implementation 'junit:junit:4.13.1'
	testImplementation 'org.springframework.boot:spring-boot-starter-test'
}
So the dependency spring-data-dynamodb allows us to represent Dynamo DB tables in model classes and create repositories for those tables.
We will create our model class Company as follows:
package com.betterjavacode.dynamodbdemo.models;

import com.amazonaws.services.dynamodbv2.datamodeling.DynamoDBAttribute;
import com.amazonaws.services.dynamodbv2.datamodeling.DynamoDBAutoGeneratedKey;
import com.amazonaws.services.dynamodbv2.datamodeling.DynamoDBHashKey;
import com.amazonaws.services.dynamodbv2.datamodeling.DynamoDBTable;

@DynamoDBTable(tableName = "Company")
public class Company
{
    private String companyId;

    private String name;

    private String type;

    @DynamoDBHashKey(attributeName = "CompanyId")
    @DynamoDBAutoGeneratedKey
    public String getCompanyId ()
    {
        return companyId;
    }


    public void setCompanyId (String companyId)
    {
        this.companyId = companyId;
    }

    @DynamoDBAttribute(attributeName = "Name")
    public String getName ()
    {
        return name;
    }

    public void setName (String name)
    {
        this.name = name;
    }

    @DynamoDBAttribute(attributeName = "Type")
    public String getType ()
    {
        return type;
    }

    public void setType (String type)
    {
        this.type = type;
    }
}
So this class Company maps to the Dynamo DB table of the same name. The annotation DynamoDBTable helps us with this mapping. Similarly, DynamoDBHashKey is the attribute key of this table. DynamoDBAttribute are the other attributes of this table.
We will create a REST Controller and a Service class that will allow us to call the CRUD APIs for this object.
package com.betterjavacode.dynamodbdemo.controllers;
import com.betterjavacode.dynamodbdemo.models.Company;
import com.betterjavacode.dynamodbdemo.services.CompanyService;
import org.springframework.beans.factory.annotation.Autowired;
import org.springframework.http.HttpStatus;
import org.springframework.http.ResponseEntity;
import org.springframework.web.bind.annotation.*;
@RestController
@RequestMapping("v1/betterjavacode/companies")
public class CompanyController
{
@Autowired
private CompanyService companyService;
@GetMapping(value = "/{id}", produces = "application/json")
public ResponseEntity getCompany(@PathVariable("id") String id)
{
Company company = companyService.getCompany(id);
if(company == null)
{
return new ResponseEntity<>(HttpStatus.BAD_REQUEST);
}
else
{
return new ResponseEntity<>(company, HttpStatus.OK);
}
}
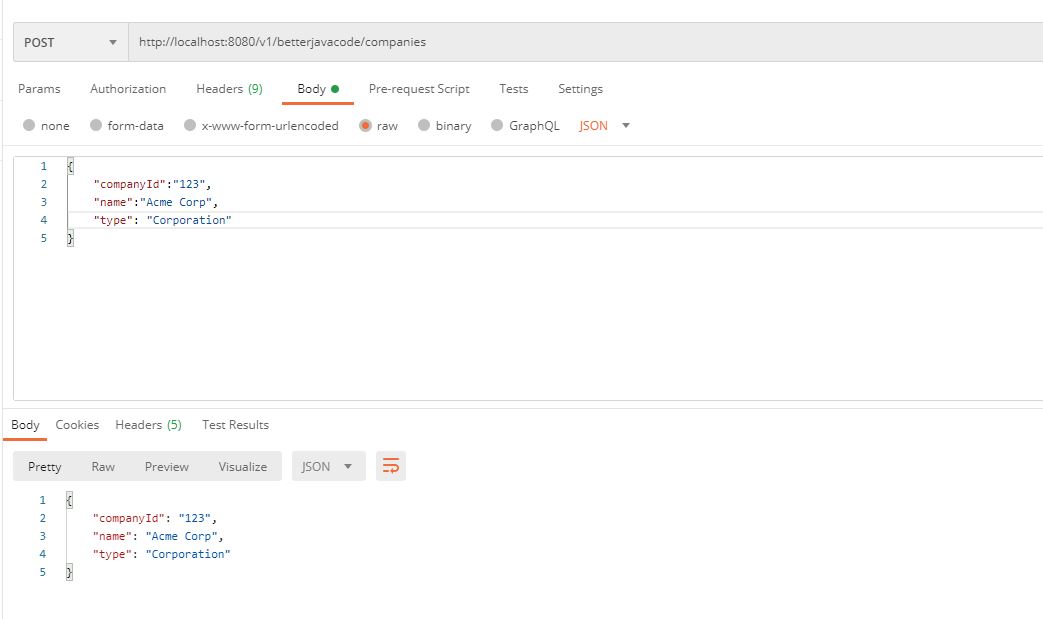
@PostMapping()
public Company createCompany(@RequestBody Company company)
{
Company companyCreated = companyService.createCompany(company);
return company;
}
}
So we have two methods one to get the company data and another one to create the company.
package com.betterjavacode.dynamodbdemo.services;

import com.betterjavacode.dynamodbdemo.models.Company;
import com.betterjavacode.dynamodbdemo.repositories.CompanyRepository;
import org.springframework.beans.factory.annotation.Autowired;
import org.springframework.stereotype.Service;

import java.util.List;
import java.util.Optional;

@Service
public class CompanyService
{
    @Autowired
    private CompanyRepository companyRepository;

    public Company createCompany(final Company company)
    {
        Company createdCompany = companyRepository.save(company);
        return createdCompany;
    }

    public List getAllCompanies()
    {
        return (List) companyRepository.findAll();
    }

    public Company getCompany(String companyId)
    {
        Optional companyOptional = companyRepository.findById(companyId);

        if(companyOptional.isPresent())
        {
            return companyOptional.get();
        }
        else
        {
            return null;
        }
    }
}
Connect Spring Boot Application with AWS Dynamo DB
So far, we have seen creating some parts of the application. But, we still have an important part left and that is to connect our application to AWS Dynamo DB service in AWS.
Login to AWS Console and access Dynamo DB.
Create a new table in Dynamo DB.

Assuming, you choose the primary key as CompanyId, we should be fine here. Remember, that’s the partition key we defined in our model class.
Now back to the Spring Boot Application. Create a new bean ApplicationConfig to define Dynamo DB configuration.
package com.betterjavacode.dynamodbdemo.config;

import com.amazonaws.auth.AWSCredentials;
import com.amazonaws.auth.AWSCredentialsProvider;
import com.amazonaws.auth.AWSStaticCredentialsProvider;
import com.amazonaws.auth.BasicAWSCredentials;
import com.amazonaws.regions.Regions;
import com.amazonaws.services.dynamodbv2.AmazonDynamoDB;
import com.amazonaws.services.dynamodbv2.AmazonDynamoDBClientBuilder;
import org.socialsignin.spring.data.dynamodb.repository.config.EnableDynamoDBRepositories;
import org.springframework.beans.factory.annotation.Value;
import org.springframework.context.annotation.Bean;
import org.springframework.context.annotation.Configuration;

@Configuration
@EnableDynamoDBRepositories(basePackages = "com.betterjavacode.dynamodbdemo.repositories")
public class ApplicationConfig
{
    @Value("${amazon.aws.accesskey}")
    private String amazonAccessKey;

    @Value("${amazon.aws.secretkey}")
    private String amazonSecretKey;

    public AWSCredentialsProvider awsCredentialsProvider()
    {
        return new AWSStaticCredentialsProvider(amazonAWSCredentials());
    }

    @Bean
    public AWSCredentials amazonAWSCredentials()
    {
        return new BasicAWSCredentials(amazonAccessKey, amazonSecretKey);
    }

    @Bean
    public AmazonDynamoDB amazonDynamoDB()
    {
        return AmazonDynamoDBClientBuilder.standard().withCredentials(awsCredentialsProvider()).withRegion(Regions.US_EAST_1).build();
    }
}
We will need to pass accessKey and secretKey in application.properties. Importantly, we are creating an AmazonDynamoDB bean here.
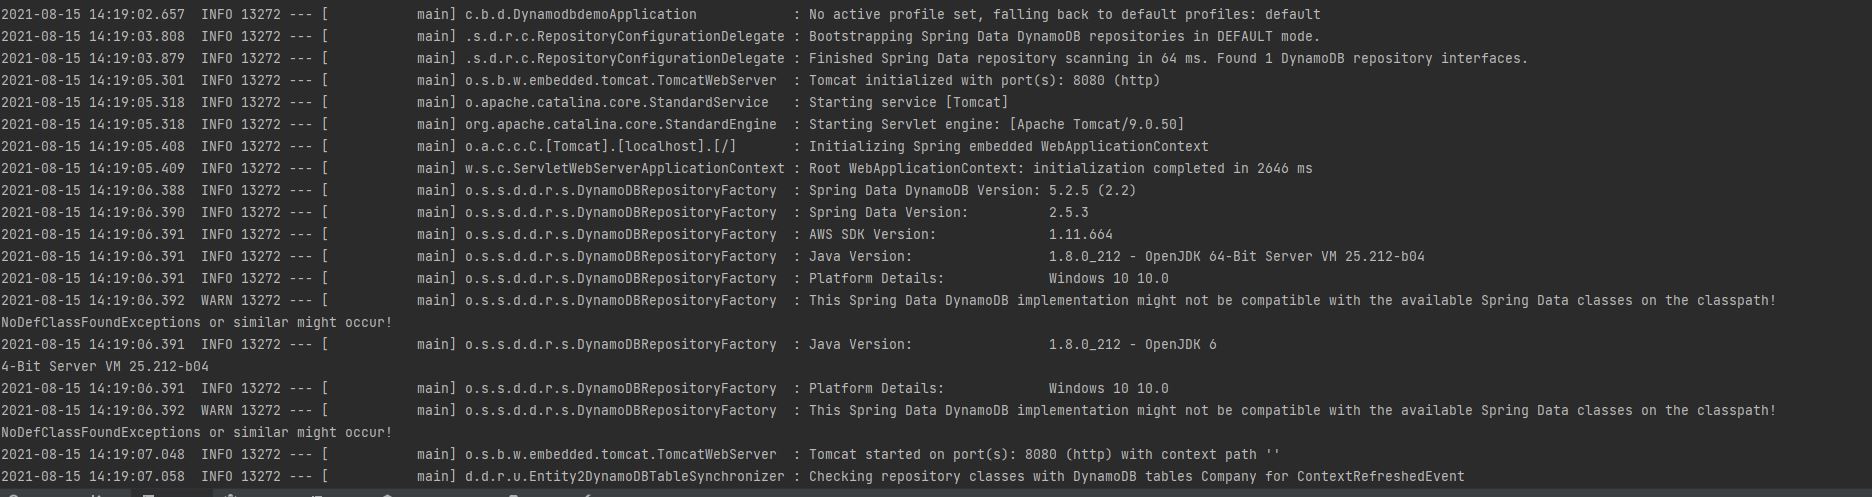
Now, let’s start our application and we will see the log that shows it has created a connection with DynamoDB table Company.
Once the application has started, we will access Postman for REST API.
Conclusion
Code for this demo is available on my github repository.
In this post, we showed how we can use Dynamo DB – a No SQL database in a Spring Boot application.
- We went over Dynamo DB concepts.
- And we created a Spring Boot application.
- We created a Dynamo DB table in AWS.
- We connected the Spring Boot application to the AWS Dynamo DB table.
References
- Dynamo DB Concepts – Dynamo DB