Category Archives: Docker

The Complete Guide to Use Docker Compose

In this post, I will cover the complete guide to using docker compose. You can use it to build a multi-container application. But what is a docker compose and why one should use it?

What is Docker Compose?

If you don’t know what a docker is, you can read about that here. If you have an application that is running on a docker and if that application is using multiple other services like database, web-server, and load balancer, then you can write multiple docker files and run multiple containers. It can be cumbersome to manage these files. And if you have to change something, you might have to change all files.

Docker compose solves this problem by allowing you to write a YAML file to define multiple containers in a single file. You write one docker file and build and run that file for all the containers.

Installing Docker Compose

Based on the definition from docker.com, docker compose is a tool for defining and running multiple Docker containers.

Depending on your environment, you will have to use the instructions to install docker compose. You will also need docker engine before you can install docker compose. I use the Windows environment, so I will show those instructions here.

  • Launch Power shell in administrator mode
  • Run this command – [Net.ServicePointManager]::SecurityProtocol = [Net.SecurityProtocolType]::Tls12
  • Then run the following command – Invoke-WebRequest “https://github.com/docker/compose/releases/download/1.27.4/docker-compose-Windows-x86_64.exe” -UseBasicParsing -OutFile $Env:ProgramFiles\Docker\docker-compose.exe

This will install docker compose. Open a new command prompt and type the first command

docker-compose -v

This should provide the docker-compose version if your installation has run without any issues.

Setting up a Spring Boot application with Docker

To show the power of docker-compose, we will be using a simple To-Do list spring boot app. I will share this app in a GitHub repository along with docker compose file. But this app includes the following applications that we will be using in docker compose:

  1. Spring Boot application
  2. Java version 8
  3. MySQL for database
  4. Keycloak for Authentication

So I won’t show implementing the Spring Boot application. If you want to download this application, you can visit the github repository or you can read my previous post here.

We will create a docker file for this Spring Boot application and this will run in its own container. Now this application connects to Keycloak and MySQL database for authentication. Keycloak will use Postgres database instead of using the same MySQL database.

The docker file for the Spring Boot application will look like below:

FROM openjdk:8-jdk-alpine
VOLUME /tmp
COPY ./build/libs/*.jar app.jar
ENTRYPOINT ["java", "-jar", "/app.jar"]

This docker file basically downloads Open JDK 8. It mounts the disk at /tmp. It copies an application jar file as app.jar. And of course, it will start the application by running java -jar .

How to write Docker Compose file

Now comes the docker-compose.yml file. This will look like below:

version: "3.8"

services:
  web:
    build: .
    ports:
      - "8080:8080"
    depends_on:
      - db
      - keycloak
    environment:
      SPRING_DATASOURCE_URL: jdbc:mysql://db:3306/todolist?autoReconnect=true&useSSL=false
      SPRING_DATASOURCE_USERNAME: betterjavacode
      SPRING_DATASOURCE_PASSWORD: betterjavacode
      KEYCLOAK_URI: http://keycloak:8180/auth
      REALM: SpringBootKeycloakApp
    networks:
      - common-network
  db:
    image: mysql:5.7
    ports:
      - "3307:3306"
    restart: always
    environment:
      MYSQL_DATABASE: todolist
      MYSQL_USER: betterjavacode
      MYSQL_PASSWORD: betterjavacode
      MYSQL_ROOT_PASSWORD: root
    volumes:
      - db-data:/var/lib/mysql
    networks:
      - common-network
  postgres:
    image: postgres
    volumes:
      - postgres_data:/var/lib/postgresql/data
    environment:
      POSTGRES_DB: keycloak
      POSTGRES_USER: keycloak
      POSTGRES_PASSWORD: password
    networks:
      - common-network
  keycloak:
    image: jboss/keycloak
    ports:
      - "8180:8180"
    command: ["-Djboss.socket.binding.port-offset=100"]
    environment:
      DB_VENDOR: POSTGRES
      DB_ADDR: postgres
      DB_DATABASE: keycloak
      DB_USER: keycloak
      DB_PASSWORD: password
      DB_SCHEMA: public
      KEYCLOAK_USER: admin
      KEYCLOAK_PASSWORD: Pa55w0rd
    depends_on:
      - postgres
    networks:
      - common-network
networks:
  common-network:
    driver: bridge
volumes:
  db-data:
    driver: local
  postgres_data:
    driver: local

The first line in this docker-compose file is the version of your docker-compose.

services define different types of services that we will use to build our docker container. web service uses an image that builds from a docker file. In our case, we are building a docker image of our Spring Boot application. This application will run on port 8080. We also have to make sure to pass the required environment variables. As you see in the file, we are using our database as db and the variable SPRING_DATASOURCE_URL shows that. db is the name of our database service that our application will connect to.

Our database service db runs on host port of 3307, but uses port 3306 (default port) on the container. This is because I have MySQL running on my host machine at port 3306, so to avoid port conflict, I am using 3307.

We have another database service postgres in our docker compose file. That uses default ports of 5432 and that’s why not specified here. Keycloak uses postgres as part of this entire application. If you don’t specify postgres, Keycloak will use an in-memory H2 database by default. The problem with an in-memory database is once you stop your container, it will lose all the data. To avoid that, I am using a real database that will save our realm and users’ data.

Another service, that we are using is keycloak. This is our IDP for authentication. The service is running on port 8180. It uses the Postgres database to connect. The command part of keycloak service instructs to run the service on port 8180 in the container instead of default 8080.

networks service defines that all these containers are part of the same network common-network with a driver of type bridge.
To make sure we can use the database, we need to mount the disk volume for both MySQL and Postgres databases. We mount these volumes locally.

Running the containers

Now to execute the containers with the application, execute the following command (make sure you build your application)

docker-compose up

This will build Docker containers for all our services and start them. Now if we access our application at http://localhost:8080

Fundamentals of Docker Compose

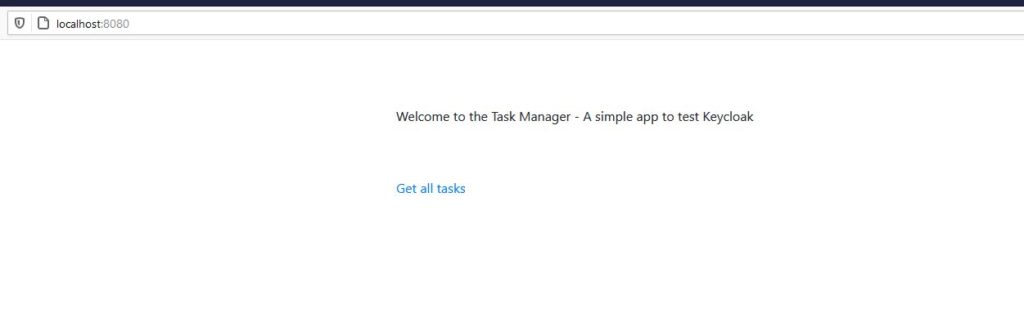
If a user clicks on Get all tasks, user will see keycloak login screen as below:

Fundamentals of Docker Compose

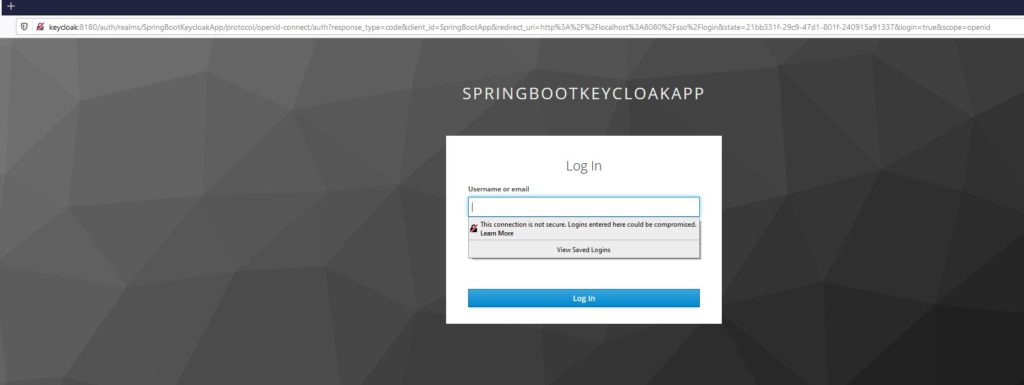
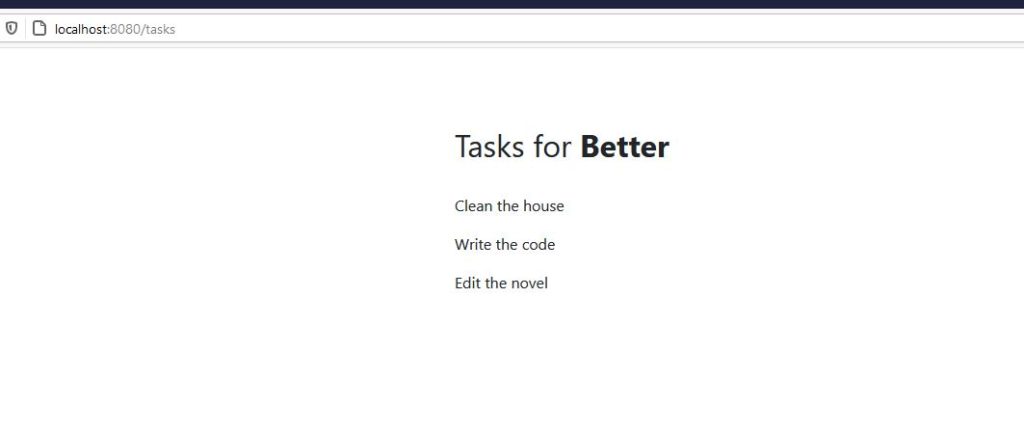
Enter the username and password, and the user will see the tasks for the logged-in user.

Docker Compose Guide

Useful commands

docker-compose up – This command will build the docker containers and start them.

docker-compose up -d – This is a similar command as above, except it will run all the processes in the background.

docker-compose stop – Stop the docker services. This will retain the previous state of containers even after you have stopped the containers.

docker-compose start – Start the docker services

docker-compose logs – Show the logs from docker containers

docker-compose ps – List the Docker containers

docker-compose run – Run one-off command. Example – docker-compose run web env – List the environment variables of web service.

Advantages of Docker Compose

  • By running most of the services in docker, you don’t have to install those services in your environment.
  • It’s easier to collaborate on the development environment with other developers by checking in the source in version control with docker-compose.
  • Quick and easy configuration. You can run your services across platforms.

Advance use of docker compose

Something I have not covered in this post is using network as  a service that you can really extend with docker compose. It also allows you to run a load balancer (or reverse proxy-like nginx) and manage the load with multiple hosts.

Instead of using environment variables, you can also use .env file for environment variables and load it while starting the containers.

Conclusion

In this post, I showed how you can use docker compose to run multiple containers with a single docker compose file. It also allows you to easily manage your environment. Similarly, you can learn about Kubernetes.

References

  1. Docker Compose – docker compose
  2. Keycloak – Keycloak containers

How to deploy Spring Boot Application on docker – Part IX

In this post, I show how to deploy a spring application in a docker container.

What is docker

Docker is a container platform delivered by a company named “Docker Inc.” It can be used by developers, operators, and enterprise users to deliver and use packaged software. Docker has something called a container. A container can be a virtual machine (VM) in lay man’s terms, but still a little different from VM. Container contains packaged software delivered in a way that it can be run isolated on a shared operating system. As per official definition – Unlike VMs, the container does not bundle a full operating system – only libraries and settings required to make the software work are needed.

In this demo, we will use our spring boot application built throughout from Part I to Part VIII.

I am using Windows Platform Toolbox for docker to build my docker containers. 

We will build a container with MySQL database deployed and another container where we will deploy spring boot application. This spring boot application container will connect to MySQL database container at runtime. The process is a little complicated, but once you get your hands on the docker container, it becomes very straight forward to understand. Also for this post, I will not explain anything about spring boot application. You should review all the previous posts I have written explaining how to build and deploy spring boot application on an embedded tomcat.

Once we know about docker, it is easy to deploy an application in docker.

Building a docker container with MySQL

Few things to remember

  1. Make sure your spring boot application is working with MySQL database before you build a container.
  2. If your application contains user administration and password, make sure you have a super administrator whose password you can insert in the database with password_hash. This is specifically true for the application we will be deploying in the docker container.

For most standard applications (like MySQL, java 8, spring-boot), there are a number of images available in the docker hub. When we will run our docker container for the database, the docker shell will pull the version of that application from the hub to build a container. We will not be creating any new or blank docker image. To run a docker container with mysql version 5.6, we will use below command.


docker run --name benefitsmysql -e MYSQL_ALLOW_EMPTY_PASSWORD=yes -e MYSQL_DATABASE=benefitsmysql -p 3308:3306 -d mysql:5.6


  • The name of our docker container is benefitsmysql.
  • We are not using any password. This is not recommended for production code, I am just doing this for demo purposes.
  • The database name is benefitsmysql.
  • Also this database is running at port 3308 to 3306 of localhost machine.
  • -d to tell Docker to daemonize the container and keep it running.
  • mysql:5.6 to download MySQL 5.6 Server image from Docker public repo

Once this is started, there are couple of ways you can verify if we are able to connect to this database or not.

Get the ip address of this container host with command docker-machine ip . Now in mysql administrator workbench, access the mysql server with ip address and port 3308 and see if you can access the database.

Another way on docker shell terminal – use this command docker exec -it benefitsmysql -l , this will connect you as a root to the shell where mysql is installed. And then you can use mysql as regular command to access mysql.

To run our Spring boot application successfully, once you access mysql, create the following tables:


use benefitsmysql;

create table companyprofile (id int not null auto_increment, establisheddate date, status varchar(50),corporationtype varchar(50), primary key(id));

create table company(id int not null auto_increment, name varchar(255), statusid int, type varchar(255), ein varchar(50), companyprofileid int, primary key(id), foreign key(companyprofileid) references company(id));

create table userprofile(id int not null auto_increment, dob date, doh date, maritalstatus varchar(50),sex varchar(50),ssn varchar(50),weight varchar(50), height varchar(50),employmentstatus varchar(50), terminationdate date, primary key(id));

create table user(id int not null auto_increment, createdate date, email varchar(255),firstname varchar(255), middlename varchar(255), lastname varchar(255),username varchar(100),jobtitle varchar(255),password_hash text,enabled tinyint(4), userprofileid int, primary key(id), foreign key(userprofileid) references userprofile(id));

create table role(id int not null auto_increment, role varchar(255), primary key(id));

create table user_role(user_id int not null, role_id int not null, primary key(user_id, role_id));


Building a docker image for Spring Boot Application along with mysql

To dockerize my spring boot application, we will use a maven plugin to build a docker image.


<plugin>
		<groupId>com.spotify</groupId>
            	<artifactId>docker-maven-plugin</artifactId>
            	<version>1.0.0</version>
            	<configuration>
                	<imageName>${docker.image.prefix}/benefits</imageName>
                	<dockerHost>https://192.168.99.100:2376</dockerHost>
                	<dockerCertPath>C:\Users\Yogesh Mali\.docker\machine\machines\default</dockerCertPath>
                	<dockerDirectory>src/main/docker</dockerDirectory>
                	<resources>
                    	<resource>
                        	<targetPath>/</targetPath>
                        	<directory>${project.build.directory}</directory>
                        	<include>${project.build.finalName}.jar</include>
                    	</resource>
                	</resources>
            	</configuration>
	</plugin>

I am passing dockerDirectory where Dockerfile will be stored to build our image. Also another change I have made to my original pom file, is that i have added packaging as jar.


<groupId>com.betterjavacode</groupId>
	<artifactId>Benefits</artifactId>
	<packaging>jar</packaging>
	<version>0.0.1-SNAPSHOT</version>
  .................
  <plugin>
      <groupId>org.springframework.boot</groupId>
      <artifactId>spring-boot-maven-plugin</artifactId>
      <configuration>
          <mainClass>com.betterjavacode.benefits.Application</mainClass>
      </configuration>
      <executions>
          <execution>
              <goals>
                 <goal>repackage</goal>
              </goals>
          </execution>
      </executions>
  </plugin>

I have also changed in my application.properties to point to mysql database container by updating database url with ipaddress of docker container.

spring.datasource.url=jdbc:mysql://192.168.99.100:3308/benefitsmysql

My Dockerfile to build a docker image is as below:


FROM java:8
VOLUME /tmp
ADD Benefits.jar Benefits.jar
EXPOSE 8443
RUN bash -c 'touch /Benefits.jar'
ENTRYPOINT ["java","-Djava.security.egd=file:/dev/./urandom","-jar","/Benefits.jar"]

Basically this will build a Benefits.jar using java 8 and will expose port 8443 that I can use to access my application.

Now build a new docker container image by using maven goal as

mvn clean package docker:build

To run the application

docker run -p 8443:8443 --name benefits --link benefitsmysql:mysql -d containerid

This will execute the jar built within that container. Important to note here is --link as it links other container where we have mysql server deployed. So we are linking two containers and we will call the database from our spring boot application container. The same command can be used little differently to see the detail execution log as below

docker run -p 8443:8443 --name benefits --link benefitsmysql:mysql -it containerid


Executing the application

Once the application starts successfully, we will access our application with url https://192.168.99.100:8443/home , this will look like below:

How to deploy on docker container

Another note – Make sure to update IP addess in all angular js references.

In this post, we showed how we can deploy Spring boot application connected to MySQL on a docker container. Code for this post will be available on GitHub repository here

References

To write my post, I used the following references

  1. Docker
  2. Connection refused error
  3. Spring Boot docker